Step-by-Step Guide: How to Create a Cookbook Index in Microsoft Word
For years I put off creating an index in my family cookbooks. The task seemed daunting and I didn’t want to fuss with marking my recipes. Well, I finally went to task to get this done for my ever-expanding personal cookbook and I have the best method and tips and tricks I’ve learned along the way to share with you.
This is a major update to my original post. After building a full index for my large, work-in-progress personal cookbook, I ran into several frustrating nesting issues and discovered much better ways to structure and maintain the index. If you read the old version, this one has a cleaner Master Index List, more reliable markup techniques, and all the troubleshooting tips I wish I’d known from the start.
Other Posts in My Cookbook Making Series
Before we dive in, here is a list of all the posts that I’ve covered on cookbook making that I think will be helpful to you:
- How to Create a Word Cookbook Template
- Cookbook Binding Options
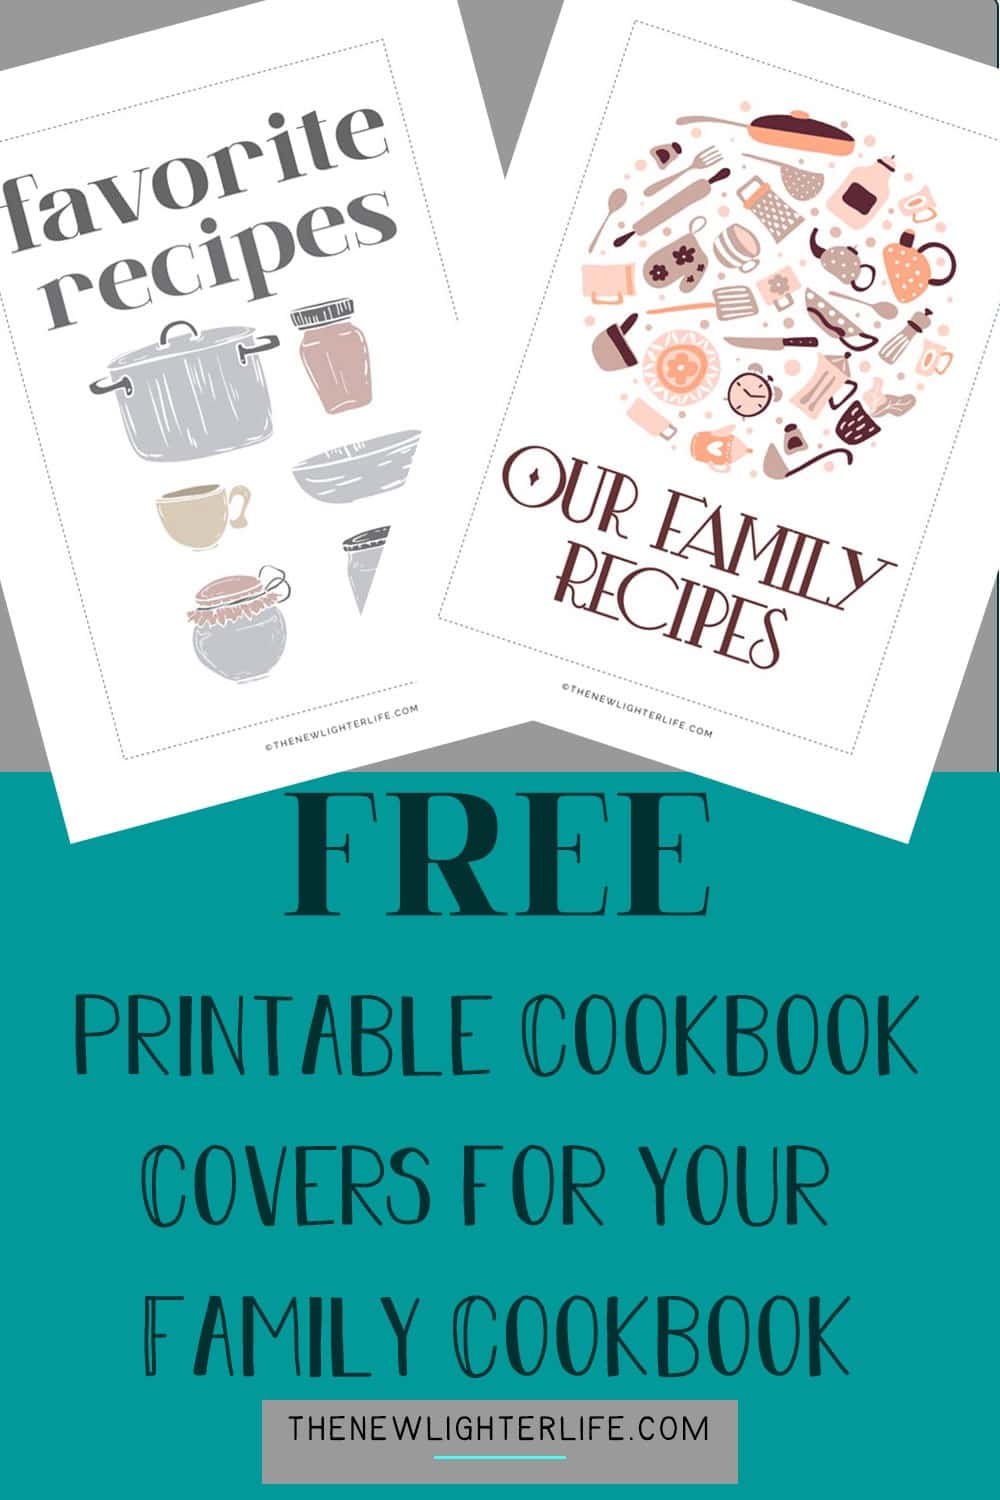
- FREE Printable Cookbook Covers
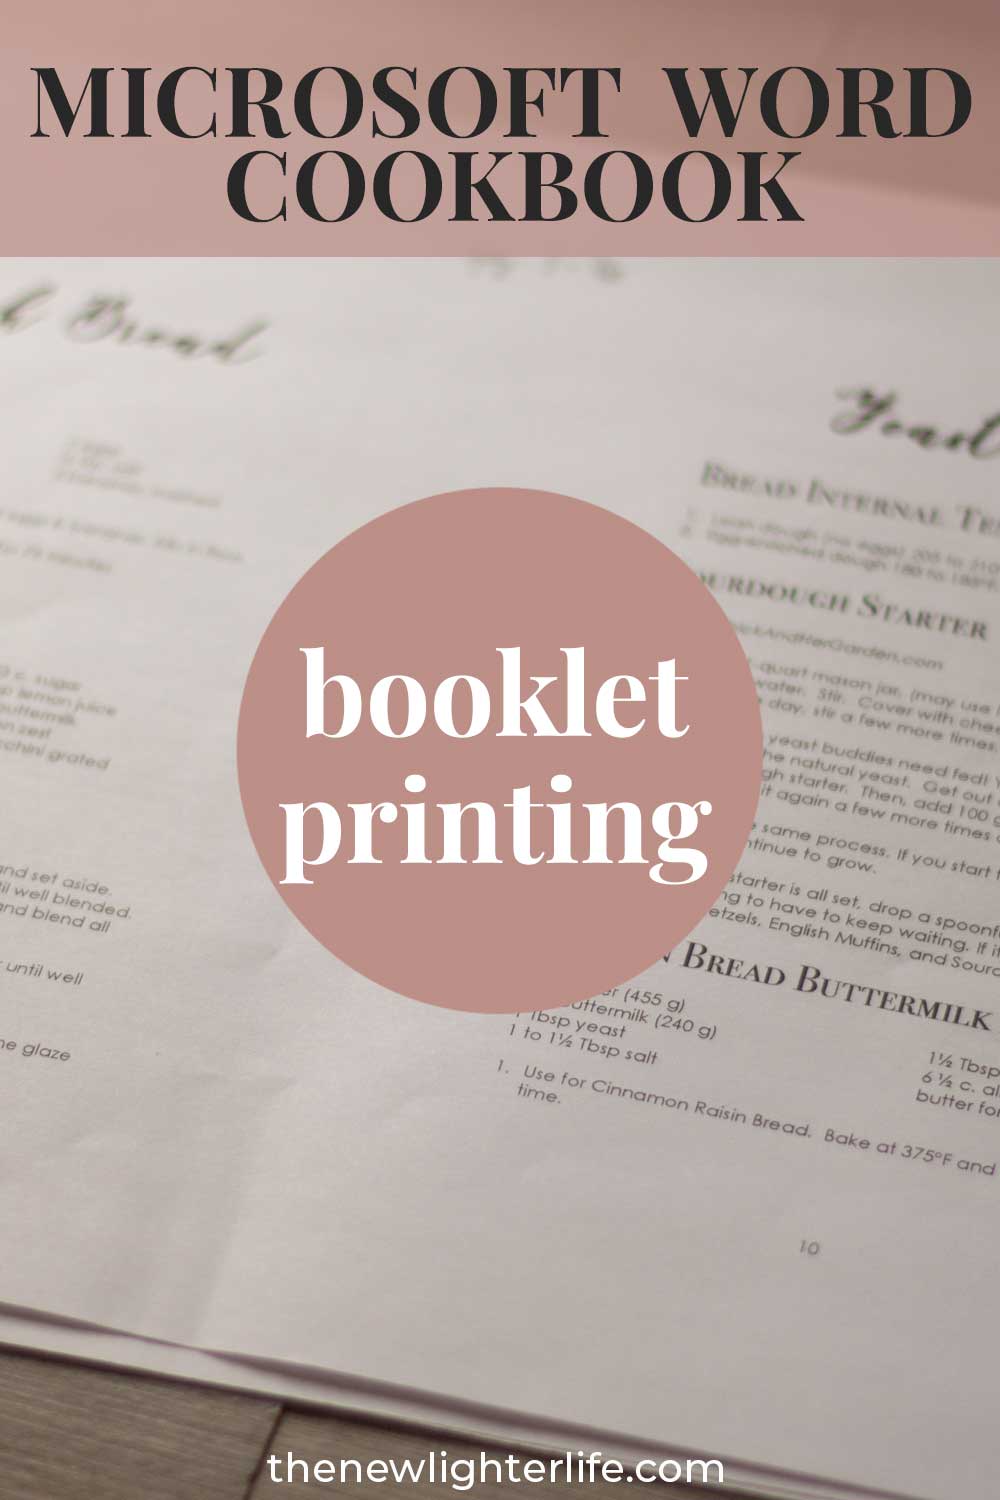
- Booklet Print Settings
- Categories – How to Organize
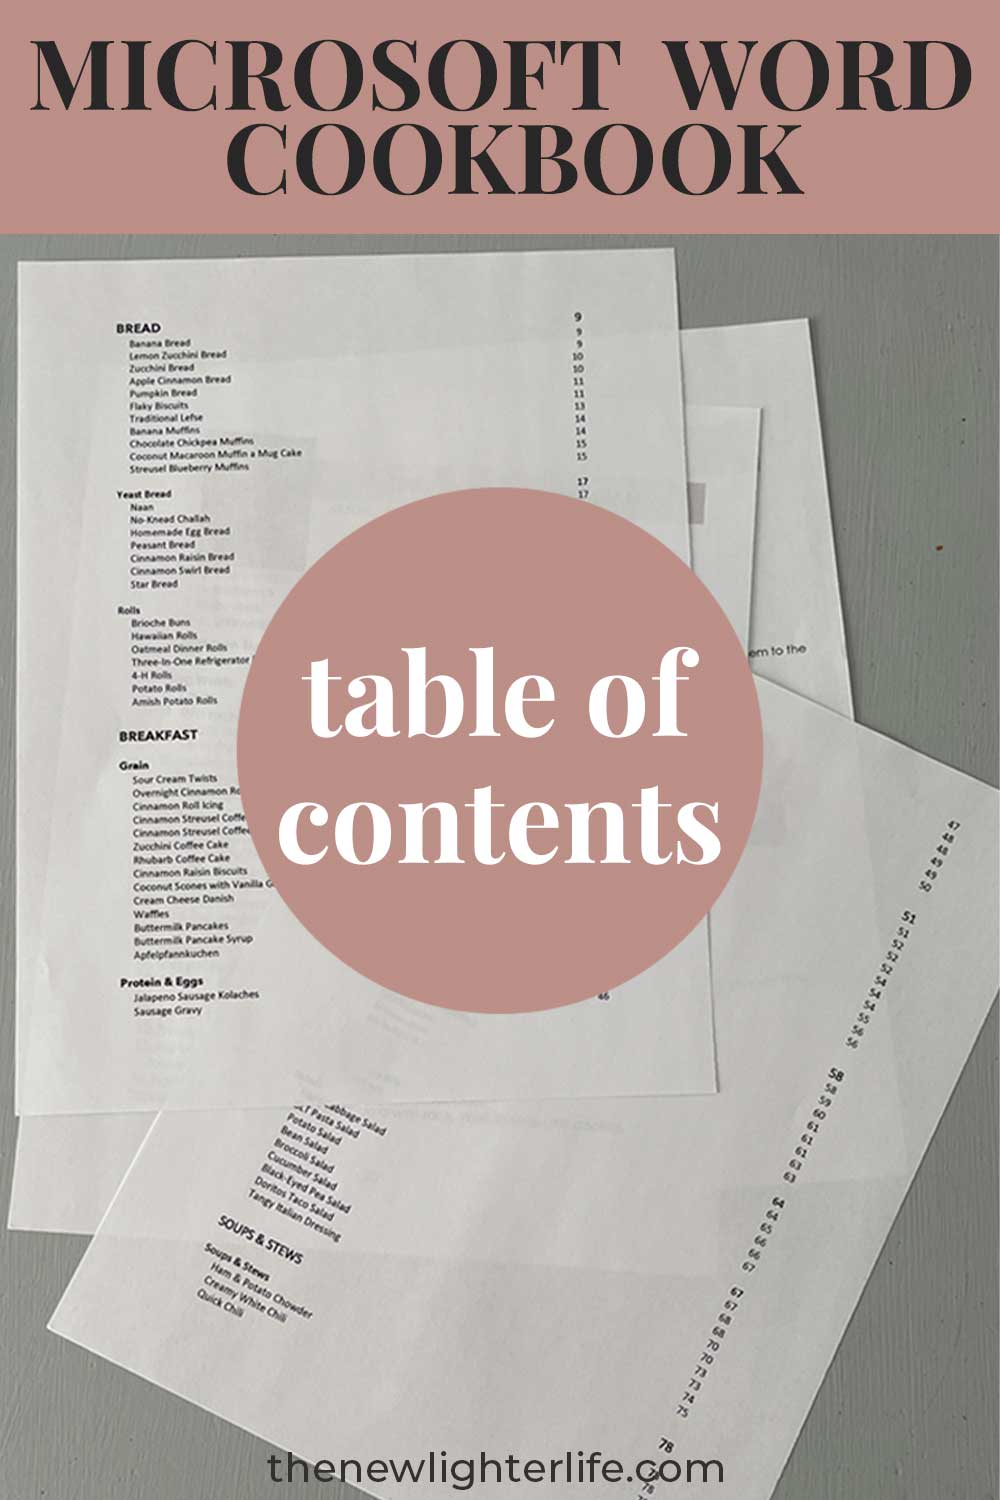
- Linked Table of Contents
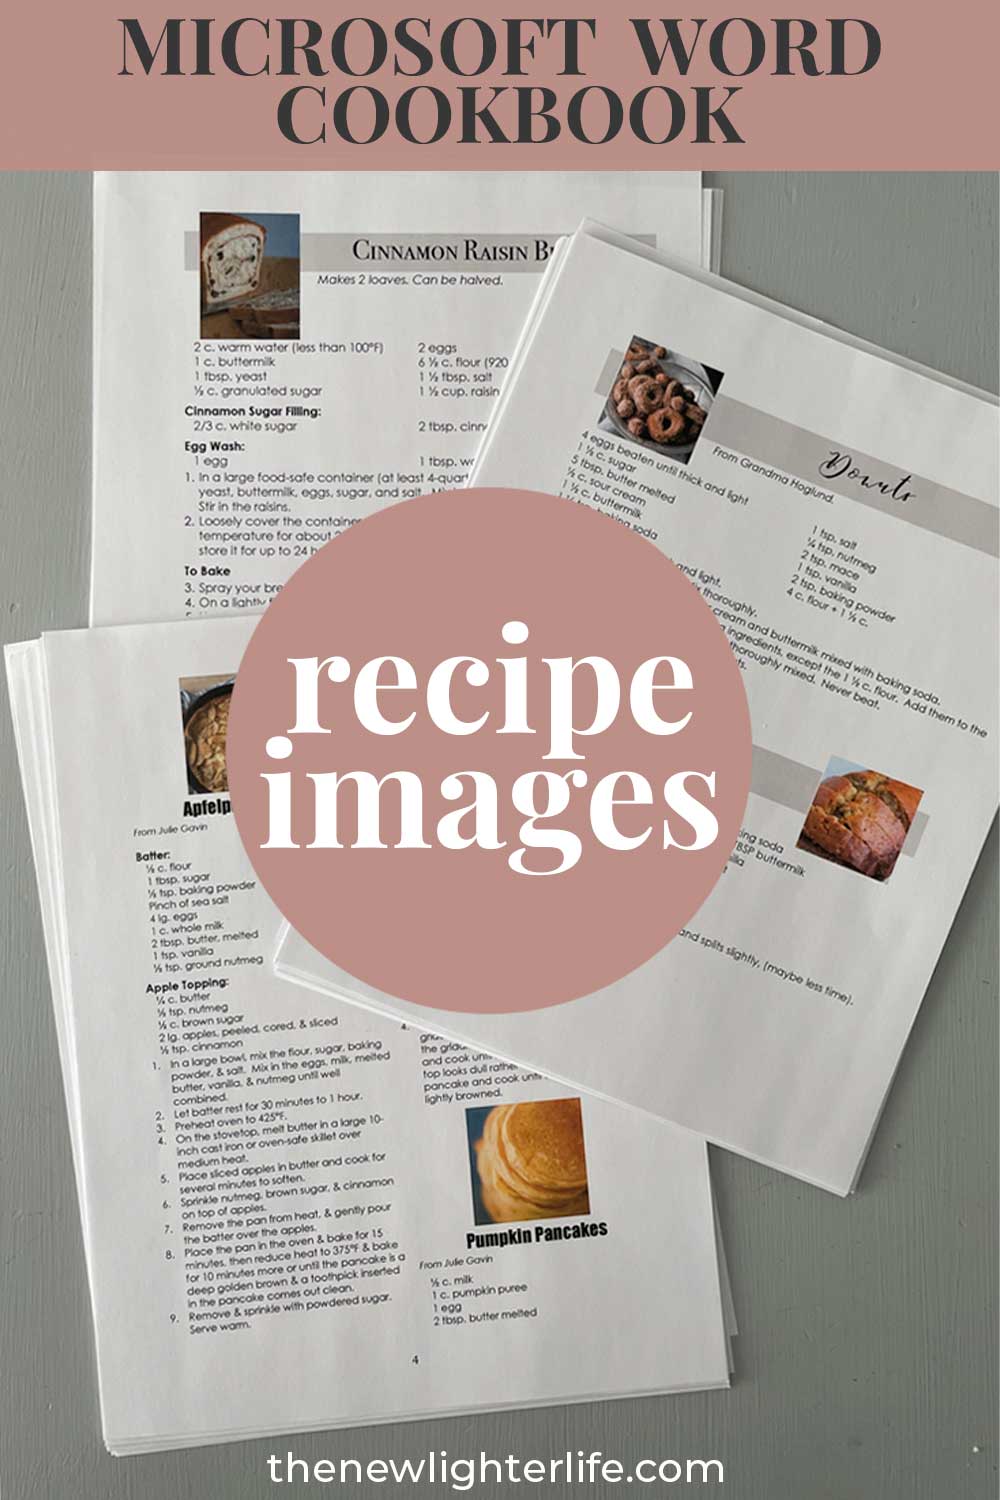
- Cookbooks with Images
- Printable Dividers & Cover
Why You Should Add an Index to Your Cookbook
Readers asked for an update to include an index and I totally understand why. An index is one of those “small” features that makes a huge difference in how useful your cookbook is.
Sure your Table of Contents already organizes recipes by category (Breads, Main Dishes, Desserts, etc.). But the index does something different — it gives users an alphabetical quick-reference so anyone can find a recipe fast, even if they only remember a key ingredient part of the name.
It’s especially helpful for:
- Craving chocolate? You can see every chocolate recipe in one spot.
- Ingredient-based searching (“What can I make with all this zucchini?”)
- Jogging your memory for holiday favorites or recipes a specific person always makes.
- Reducing the number of categories in your Table of Contents — you can index by Quick Breads, Muffins, Yeast Loaves, Rolls, etc., while keeping everything under one broader “Bread” section.
- Using a specific cooking method, (i.e. Crockpot, Instant Pot, No-Bake) is helpful especially during summer months when you don’t want to use your oven.
Once I finally created one, I wondered why I waited so long. With my index, I’m able to find specific recipes so much quicker. In fact, I use my index over my Table of Contents 90% of the time.
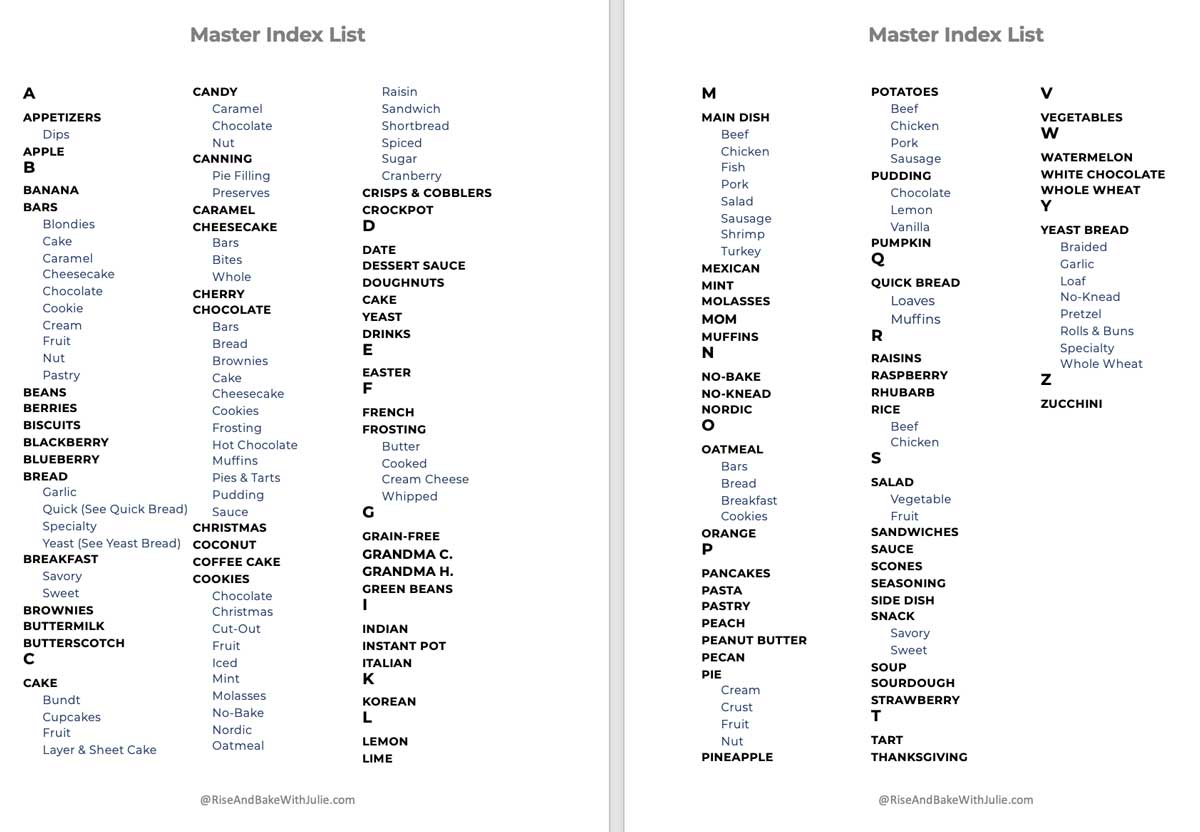
Master Index List
**DO NOT SKIP THIS STEP** Before you mark a single entry, create a Master Index List. This can be done either on a piece of paper or electronically in Word, Excel, or Google Docs. This list will guide you and keep you on track as you index your recipes.
Without this list, I might accidentally index one of my quick bread recipes under “Breads” instead of “Bread”. This will create a whole new index main category and it can get messy fast. In short – be precise in your naming, punctuation, and capitalization.
As you develop your list – it helps to think in terms of how you or others will want to search for recipes. This is going to vary widely from person to person plus the intent of your cookbook. Below is the sample of how you’ll can start organizing your index.
Suggested Main Categories to Start With
Below is example of a starting structure for your Master Index List, or you can view my full list here.
- A
- Appetizers
- Apple
- B
- Banana
- Bars
- Beans
- Berries
- Biscuits
- Blackberry
- Blueberry
- Bread
This is just a start to help as you organize. If you’d like my personal Master Index List to build off of to customize, click the image below. My structure is by no means perfect, but it’s the one I currently use based on the sheer volume of recipes I have in my cookbook.
As you can see, it may be helpful to add cross-references like “See Also” for popular groupings under bread. These categories give readers multiple ways to find what they’re looking for without extensive subentry levels.
Subcategories
Subcategories are very useful as well. Let me explain…
Since I have many bar recipes, my personal cookbook index has a breakdown of the different tyes. For example:
- Bars:Blondies
- Bars:Cake
- Bars:Caramel
- Bars:Cheesecake
- Bars:Chocolate
- etc.
“Bars” is the top index category and the info after the colon (no space in there) is the Subcategory in the index. You can go to 9 subcategories levels in total, but that would be challenging to keep straight and the risk of “breaking” your index is greater.
That said, you are able to add subcategories as needed that make sense for your recipes.
See Also References
It may be helpful to add cross-references like “See Also” for popular groupings under heavy categories. These categories give readers multiple ways to find what they’re looking for without extensive subentry levels.
For example, someone might be tempted to search for a quick bread recipe, yeast bread recipe, or muffins.
If you have a lot of recipes that fit into each of these subcategories, it may be easier to direct them away from the big Bread category to another slightly smaller category:
- Bread:Garlic
- Bread:Quick (see Quick Bread)
- Bread:Speciality
- Bread:Yeast (see Yeast Bread)
Doing this helps keep the Bread section more manageble in size while eliminating another subcategory. Then in the new section you can separate out various types of quick breads such as:
- Quick Bread:Loaves
- Quick Bread:Muffins
- Quick Bread:Biscuits
- Quick Bread:Other
Recipe Titles
In order to see the name of the recipe in your index (versus just a page number) you’ll need your Recipe Name to be the last subentry. For example:
- Bars:Blondies:Birthday Cake Blondies
- Bars:Blondies:Classic Blondies
- Bars:Blondies:Cookies & Cream Blondies
or in a more simple structures such as:
- Bars:Birthday Cake Blondies
- Bars:Classic Blondies
- Bars:Cookies & Cream Blondies
This is just another example for why you need your Master Index List – so you keep all the subentry levels cohesive.
How to Create a Cookbook Index in Microsoft Word
Now that that’s out of the way, here is the entire process for creating an index for your cookbook.
My Index Process:
1.Master Index List
- Create a Master Index List first to help with consistent structure.
2.Show Characters in Document
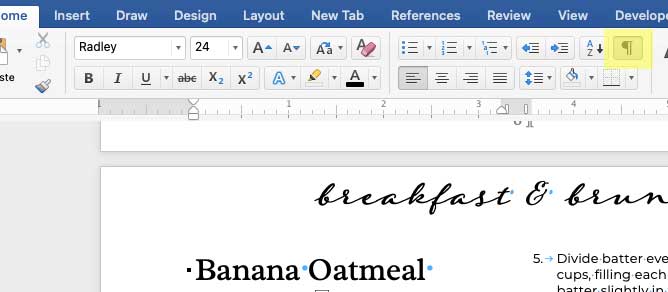
- Turn on Show/Hide ¶ button on the Home tab to see the hidden markup data you’ll apply.
3. Mark Recipes
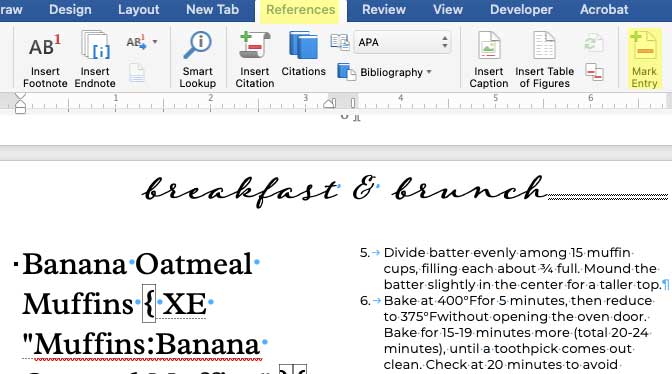
- Place cursor directly after the recipe name, click the References tab and then “Mark Entry.”
- Type Main Index Entry (no spaces before or after text.
- Type Subentry (if applicable) Colon (:) and Recipe Name No spaces before/after text, or next to colon separater.
- Mark “Current Page” (should be default).
- Click “Mark.”
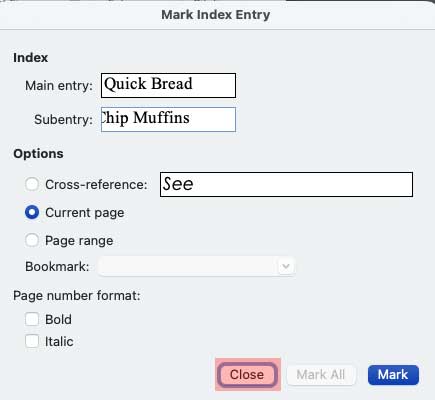
- Keep Mark Index Entry window open and continue markup for that same recipe (under a different index category) or move your cursor to directly after the next recipe name for markup.
4. insert index
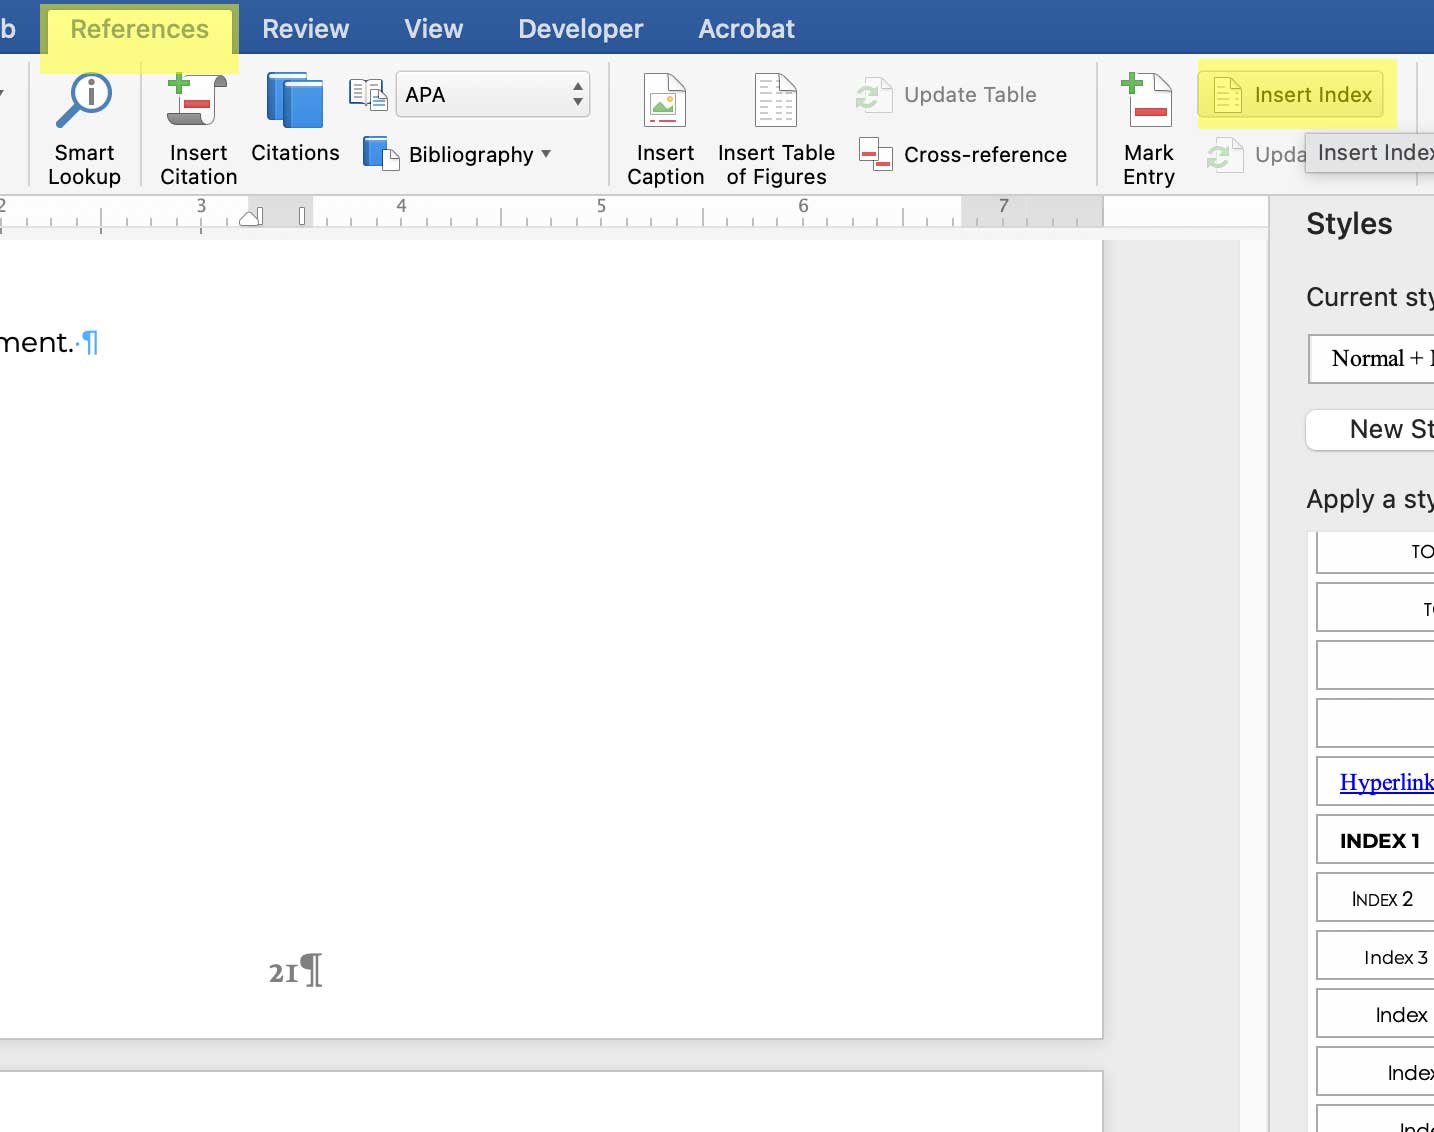
- Partway through the process, I recommend you insert the index to make sure it is showing up correctly.
- Do do this – Go to the last page of your cookbook.
- Go to References Tab, and click “Insert Index.” Select style you’d like.
5. Customize index
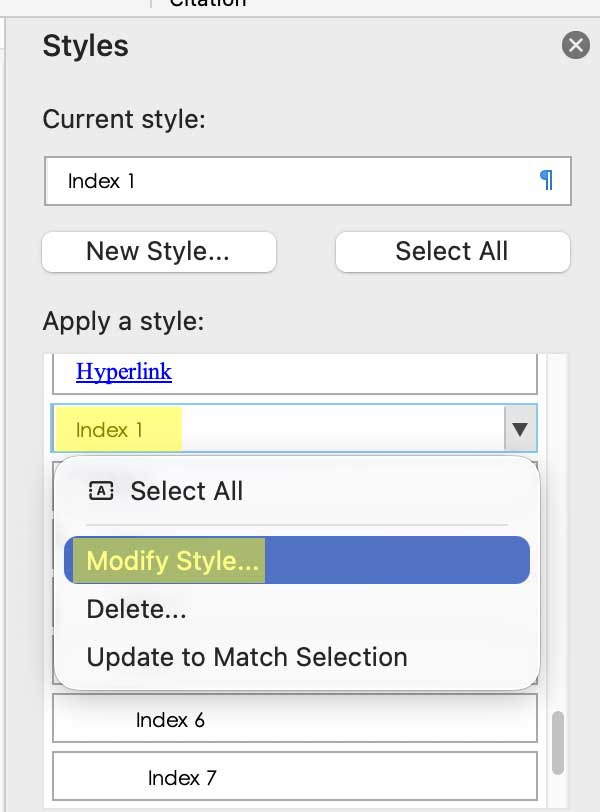
- Once your index is inserted, you can tweak the appearance of the index.
- To do this, view the Styles pane and select the Index style level to edit, and click “Modify Style…”
- Continue to update each index heading depending on how many levels your subentries go.
5. Update index
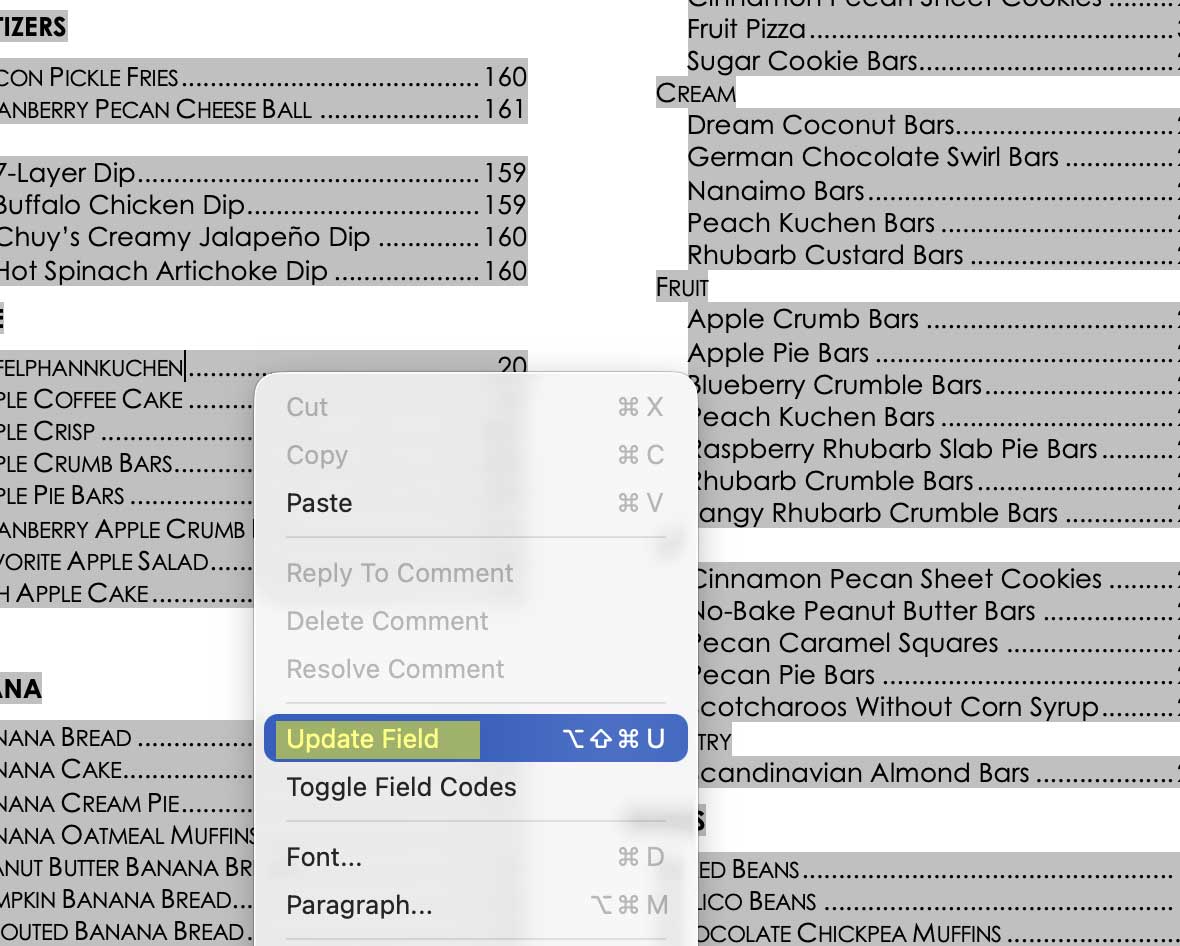
- After new markup, you’ll need to update your Index.
- To do this, just place the cursor in index, right-click and select “Update Field.”
Video Demo
Tips and Tricks I Learned the Hard Way
Creating the index took way longer than I expected (over 60 hours!), but these tips will save you a lot of time and frustration.
- Turn on Show/Hide right away — Click the ¶ button on the Home tab so you can see all your hidden { XE “…” } fields.
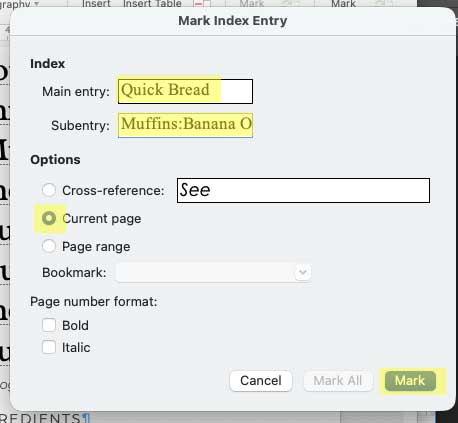
- Use Mark Entry Window in the pop-up window – Keep it open while working. Type your markup directly in the boxes instead of copying and pasting XE fields.
- Main Entry:Quick Bread
- Subentry:Muffins:Banana Oatmeal Muffins
- Make sure “Current Page” is selected
- Click Mark but do NOT close the window. Move to the next recipe (or mark the same recipe under a different index category and click Mark. Using the popup Markup Box is the best way to make sure no hidden strokes end up in your index markup.
- Do NOT copy and paste { XE “…” } fields and then just retype the info. For the life of me, I can’t figure out why but this breaks nesting some of the times.
- Be extremely consistent with colons and spacing — Use this exact pattern: Main:Sub:Recipe Name with no spaces around the colons. This is the simplest way nesting fails.
- The “reset trick” that saved me — If you follow these tips and nesting still breaks, delete the colon between main and sub entries, update the index, then add the colon back. This forces Word to re-parse the field correctly.
- If your index is still broken (not nesting properly) delete old fields before re-marking — When you edit or duplicate markup, Word sometimes leaves behind duplicate XE fields. Always delete the old ones first if you have a stubborn broken nesting.
- If all else fails – use a shallower nesting structure. I tried to avoid this at all cost but sometimes you just have to accept a less than ideal nesting. Deep nesting (Chocolate:Cookies:Recipe Name) is nice and tidy but the nesting can become dicey the more levels you nest down. If you can’t get it to work, it may be easiest to remove a sub-level and use Chocolate Cookies:Recipe Name instead.
- Keep your Master Index List updated and as your guide to keep you on track with how you’re indexing. Whenever I decided to make changes in how I was categorizing, I updated the Master Index List first, and then referred to it as I was doing my markup.
Final Thoughts
This cookbook add-on was an exercise in patience! But once you have a good system (Master Index List, consistent markup steps + reset tricks/options for stubborn entries), it becomes much easier to maintain—especially for an ever-updating cookbook like mine.
The index makes your cookbook so much more usable everyone who gets to enjoy it. They can quickly find “all the rhubarb recipes” or “every chocolate chip cookie variation” without flipping through big categories or the whole book.
I’m always looking at improving my cookbooks, so if you have suggestions for features you’d like to see added, please let me know in the comments!
Happy Cookbook Making!
As an Amazon Associate, I earn from qualifying purchases at no extra cost to you. Thank you for your support!

Hi —
Good information on both a TOC and Index. I’m organizing my recipes in binders, not electronically. Using Excel would resolve all the issues I discuss here but I don’t want to load a computer program each time I need to see a recipe.
Here’s the situation. First, okay, I make a TOC, which is an efficient way to organize the recipes. They would be put in a binder (or binders in my case) and be easily found per category. The problem comes in with page numbers. With an unchanging, forever list of recipes, no problem. All items are page-numbered and in sequence per the TOC.
But, my recipe list is continually expanding. New items are added every couple days. The page numbers are effectively tied to each item. Adding a new recipe means adding a new, sequential page number. With the roughly 200 items I have, a new item, say braised chicken, would receive page number 201. Fine, except that this fouls up the TOC, right?
I can easily add an item to the TOC, but “Chicken” runs from pages 37-45, my new “Chicken” item gets page 201. Hmm . . .
It looks as though there are two options. I could index roughly by key recipe names and then index the key words from each title. I’d have to rewrite the titles to reflect this . (This would be like inserting key words in a website to allow Google to find it.) The TOC in this case would be practically useless.
The other option would be not indexing at all and making the TOC an organic animal in which new items would be placed per category/subcategory/sub-sub category. Not that difficult but . . . goodbye index.
Thoughts and advice.
Thanks,
Mike Carter, recipe hoarder
Hi Mike! Thanks so much for sharing your detailed thought process. You’ve put a lot of work into organizing your recipes.
If you’re working entirely in Word (and keeping it digital), you can simply right-click on the Table of Contents, choose Update Field, then Update entire table, and Word will automatically refresh page numbers and headings for you. This means your TOC will always reflect newly added recipes or sections.
However, the real challenge is how you’re archiving them physically. Even if you can update your TOC in Word, you’d have to reprint or replace any pages that change as you insert new ones—otherwise, the printed page numbers will no longer match what’s in the TOC.
Here are a couple of approaches that might help:
1. Organize by Category/Subcategory Instead of Strict Page Numbers
• Use your binder dividers for major categories (e.g., Chicken, Desserts, Salads) and list the recipes within each category. That way, you can insert new recipes in the right section without renumbering everything.
• In Word, keep a simple TOC organized by these headings rather than worrying about sequential page numbers. Then within each category, you can have a mini-TOC or a quick list of recipe titles.
2. Use an Index for Ingredients or Key Terms
• An index can help you find specific recipes by main ingredient or cooking style (e.g., “chicken,” “braised,” “grilled”), even if you keep the main binder organized by category.
• You can update the index the same way you do the TOC—just right-click and select Update Field. Again, this is great if you’re viewing everything on-screen, but you’ll need to reprint any changed pages for a physical binder.
3. Leave Blank Pages or “Flex Space”
• If you want to maintain page numbers in a binder, consider spacing your recipes out so you can slot in new ones without disrupting the sequence too much. For example, print your chicken category on pages 30–50, even if it only takes up 30–45 right now. That way, you have room to add more recipes without affecting the rest of the binder’s numbering.
In the end, whether you rely on a dynamic TOC or an index, you’ll still face the logistics of physically updating pages in a binder. If that becomes too cumbersome, you could maintain an electronic “master copy” (with the auto-updating TOC and index) and only print yearly.
I hope that sheds some light on the pros and cons of each option. Let me know if you have any other questions or if something else has worked better for you—always happy to learn from a fellow recipe hoarder!