Minnie Winnie Renovation: Replacing Rotting Walls in a Camper
About a year ago, we sold our renovated travel trailer and bought a 2002 Winnebago Minnie Winnie 31R. It felt like an exciting new chapter, but—spoiler alert—it came with a big surprise: rotting walls and mold. I’ve had lots of comments on this post and the YouTube video regarding using bleach to treat the mold, especially on porous surfaces like wood. These are all great questions and they deserve answers! Today, I’m updating our story to share how we replaced those rotting walls, what we learned about mold, and why bleach may not always be the best fix for porous materials.

Our Big Mistake: Inspecting Before Buying
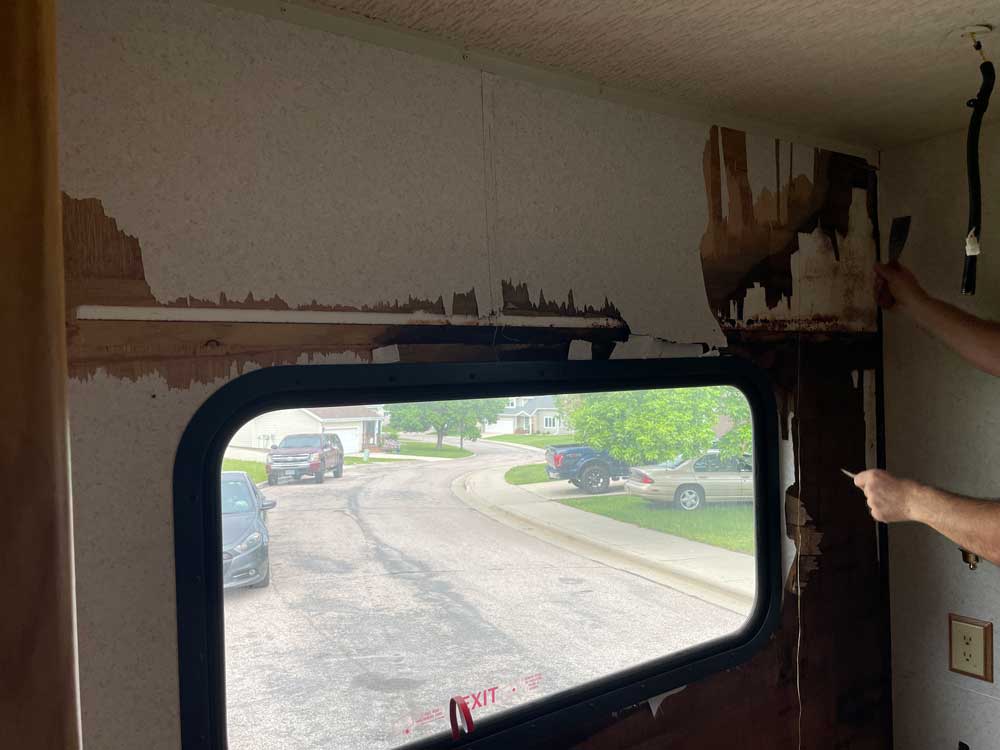
When we checked out the Minnie Winnie, the owner pointed out some delamination on the back driver-side corner wall. He’d sealed the exterior and said the RV shop gave it a thumbs-up, so we weren’t too worried. The interior wall felt solid, and he seemed honest, so we bought the camper. Looking back, we missed some red flags—like the air fresheners masking a musty smell. Lesson learned: always dig deeper when buying a used RV!
Why Replace Rotting Walls?
A few weeks after buying, while prepping for a Smoky Mountains and Florida trip, Mark grazed the back interior walls while making the bed. They were squishy. We knew we couldn’t ignore it. Here’s why replacing rotting walls is critical:
- Structure & Safety: Rot weakens walls, cabinets, and overall camper stability over time.
- Resale Value: Full disclosure about repairs builds trust with buyers, and a fixed RV sells better than one with hidden damage.
- Health: Mold can harm your lungs, especially in a small space like an RV. Proper removal is a must.
Since our trip was looming, we postponed the repair until we returned.eal with the repair when we got back.
Signs of Rotting Walls & Mold
If you suspect damage in your RV, look for these clues:
- Soft spots in walls, floors, or ceilings.
- Discoloration or water stains.
- Musty odors (especially after removing air fresheners).
- Warped, buckling, or peeling walls/seams.
- Delamination (outer wall layers separating).
Our RV had soft spots, peeling seams, a musty smell, and delamination—clear signs of trouble. (P.S. We also fixed a leak in our travel trailer; you can read about that here.)
Top Priority: Find & Fix the Leak
Rotting walls mean water is getting in, so you must fix the leak first. Here’s how to track it down:
- Roof: Inspect for cracks, holes, or worn seals around vents and antennas.
- Windows: Check seals and frames for damage or warping.
- Exterior: Look for cracks, gaps, or holes in siding or corners.
- Plumbing: Examine pipes and connections for leaks.
- Water Stains: Trace stains to their source.
- Test: Simulate rain with a hose to spot water inside.
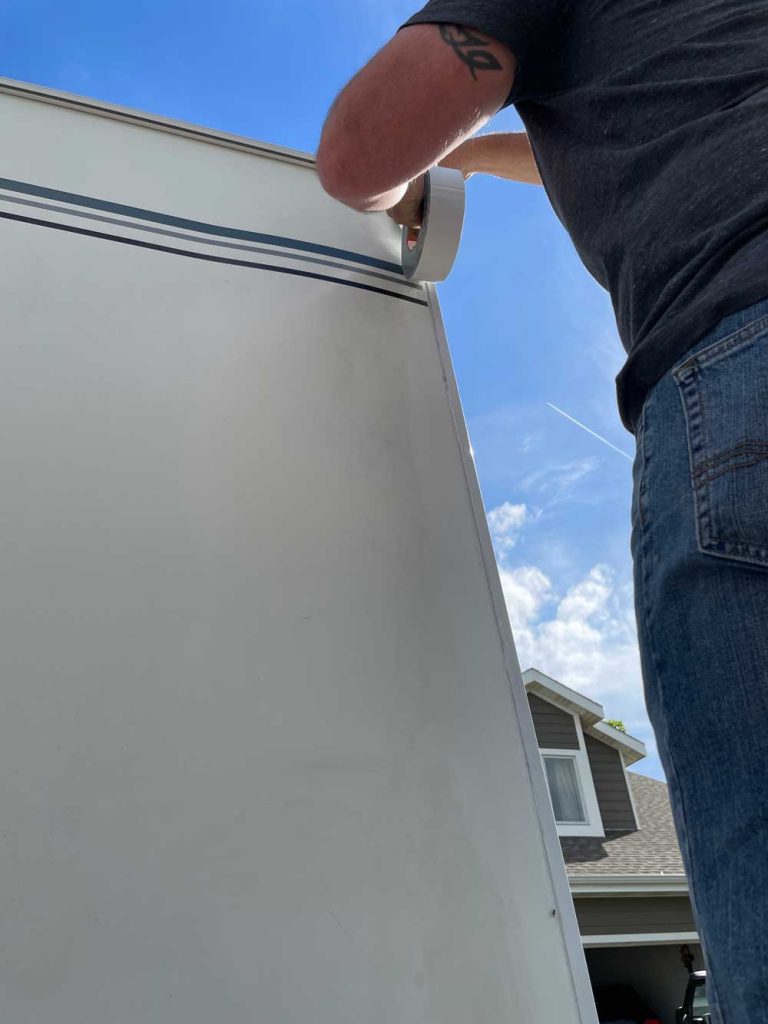
We used Eternabond tape to seal our leak, which worked like a charm. Fix the source before moving forward, or the rot will return.
Tools & Supplies For Wall Replacement
You won’t know the full extent of damage until you start, but here’s what you’ll need:
Tools:
- Circular saw or jigsaw (for cutting panels).
- Drill and driver bits (for fixtures and framing).
- Stapler and staples (for securing panels).
- Pry bar and hammer (for removing old panels). We like Purdy Painter’s tool for this.
- Utility knife (for cutting sealant).
- Measuring tape.
- Mask (to protect against mold spores).
Materials:
- Eternabond tape (for exterior seams).
- Hydrogen peroxide or vinegar (for mold treatment; more on this below).
- Kilz primer (for sealing wood).
- 2″ Thick Insulation (to replace damaged insulation).
- 1/8″ hardboard panels (4’x8’ from hardware stores).
- 1”x4” wood boards (for framing).
- Liquid Nails (for window frames).
- 1.5” wood screws and staples (for securing boards).
- Butyl seam tape (for window gaps).
- Sherwin Williams Cashmere paint/primer (optional).
Replacing the Rotted Walls in Camper: Step-By-Step
Here’s how Mark tackled our back wall replacement. Your process may vary depending on the wall’s location.
1. Prep the Area
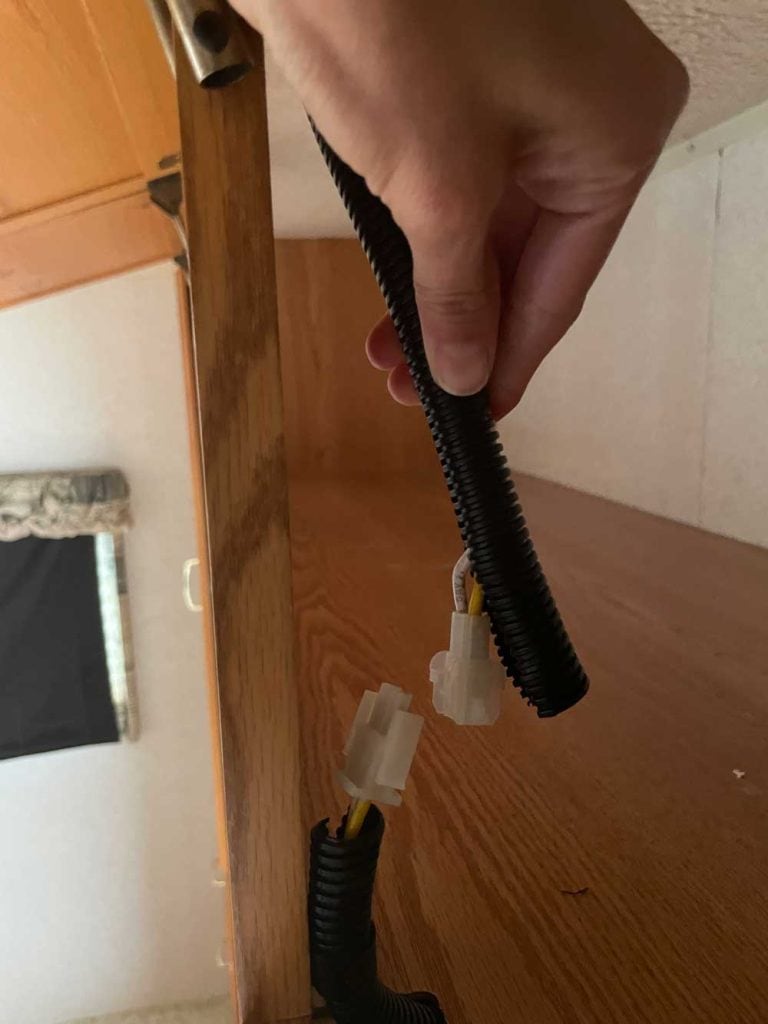
- Disconnect power to the RV (especially if electrical outlets are on the wall).
- Clear belongings and remove fixtures (e.g., cabinets, bed, nightstand) with a drill. Our bed’s water tank and pump stayed in place.
- Decide whether to remove exterior windows now or later. We waited until installing the new wall, covering the RV with a tarp during repairs.
In our case, the bed and its compartment had to go along with the upper cabinets and the nightstand. Underneath the bed are the water tank and pump, which stayed in there.
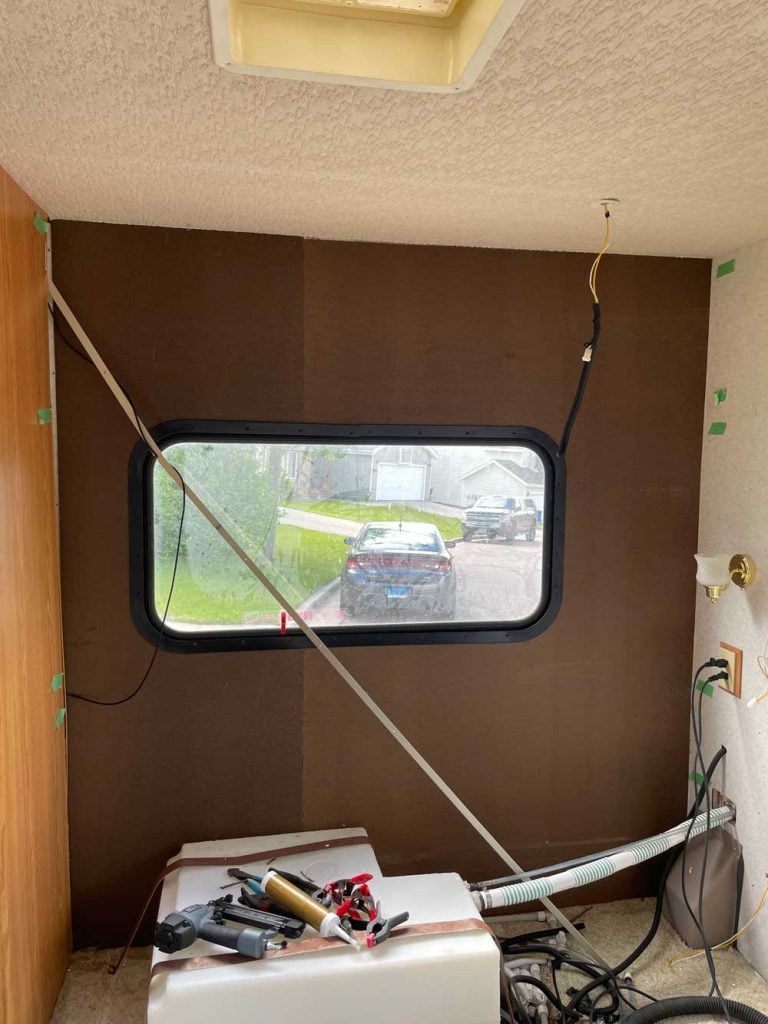
2. Tear Out
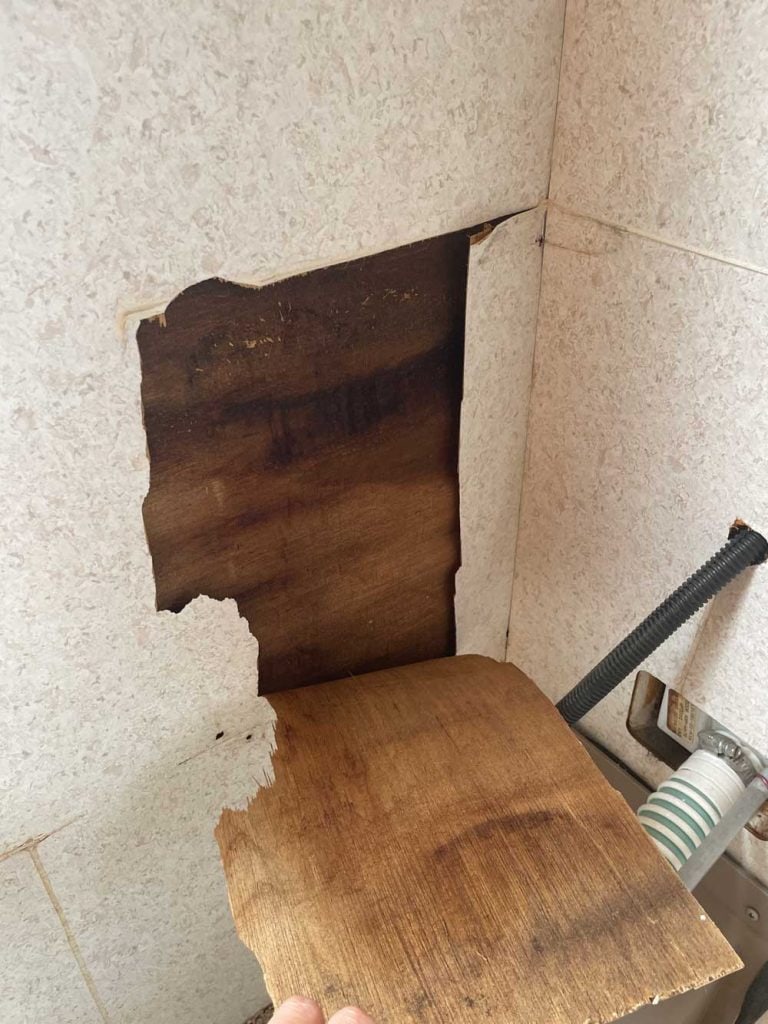
- Remove rotten wallboard until you reach undamaged areas where new panels can join cleanly.
- Pull out moldy or damaged insulation.
- Assess support boards. Replace if unsafe; we salvaged ours.
- Scrape old caulking from windows (use rubbing alcohol or mineral spirits).
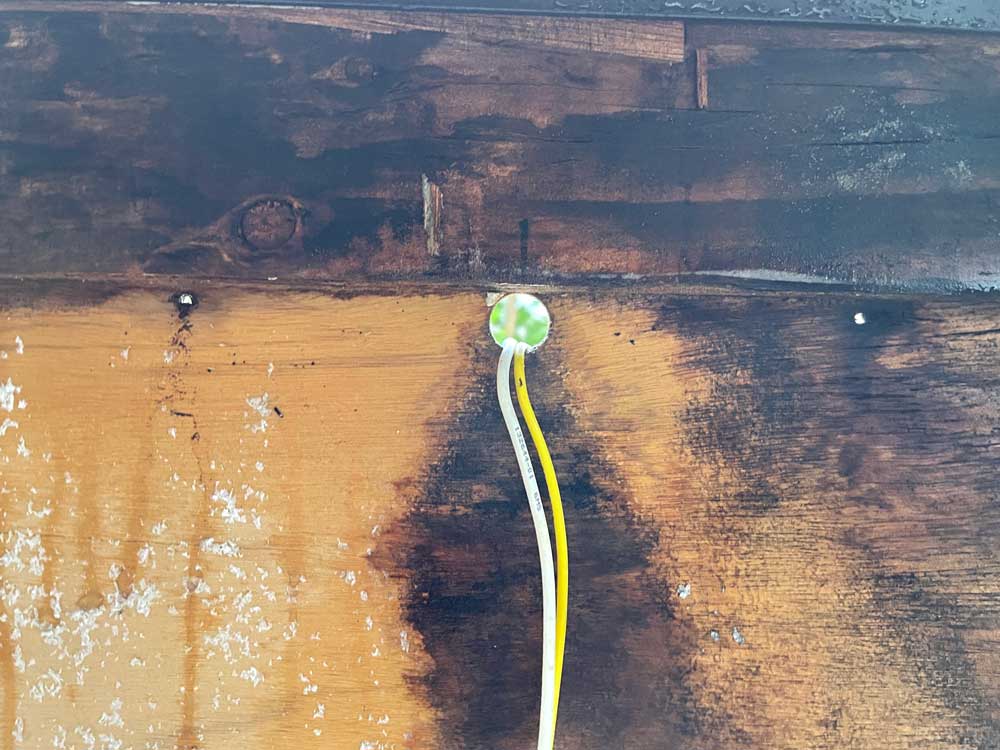
3. Mold Removal (Updated!)
Multiple readers have asked about using bleach on porous surfaces like RV wood or insulation. Here’s the deal: bleach can kill surface mold, but it doesn’t penetrate porous materials well, and its water content can feed mold growth if not dried completely. For our RV, we originally sprayed a bleach-water mix (1 cup bleach to 1 gallon water), but we’ve since learned better options for porous surfaces:
- Hydrogen Peroxide (3% solution): Spray or wipe onto moldy wood or insulation. It penetrates better than bleach and breaks down into water and oxygen, reducing moisture risks.
- White Vinegar: Spray undiluted vinegar, let sit for an hour, then wipe clean. It’s safe and effective for mild mold.
- Commercial Mold Removers: Products like Concrobium or RMR-86 are designed for RVs and porous surfaces.
Steps:
- Put on protective gear, (mask and gloves).
- Spray or wipe moldy areas with your chosen solution.
- Wipe clean and spray again.
- Let dry completely (24-48 hours). Use fans or a dehumidifier to speed drying.
NOTE: If mold is severe, replace affected wood or insulation entirely.
4. Seal With Primer
- Apply Kilz primer to all original wood and surfaces. Let dry.
- Apply a second coat of primer to exposed areas and let dry.
5. Fix Delamination
For delaminated exterior fiberglass (e.g., around windows):
- Apply Liquid Nails between wood and fiberglass.
- Clamp tightly and apply pressure.
- Let cure for 24 hours.

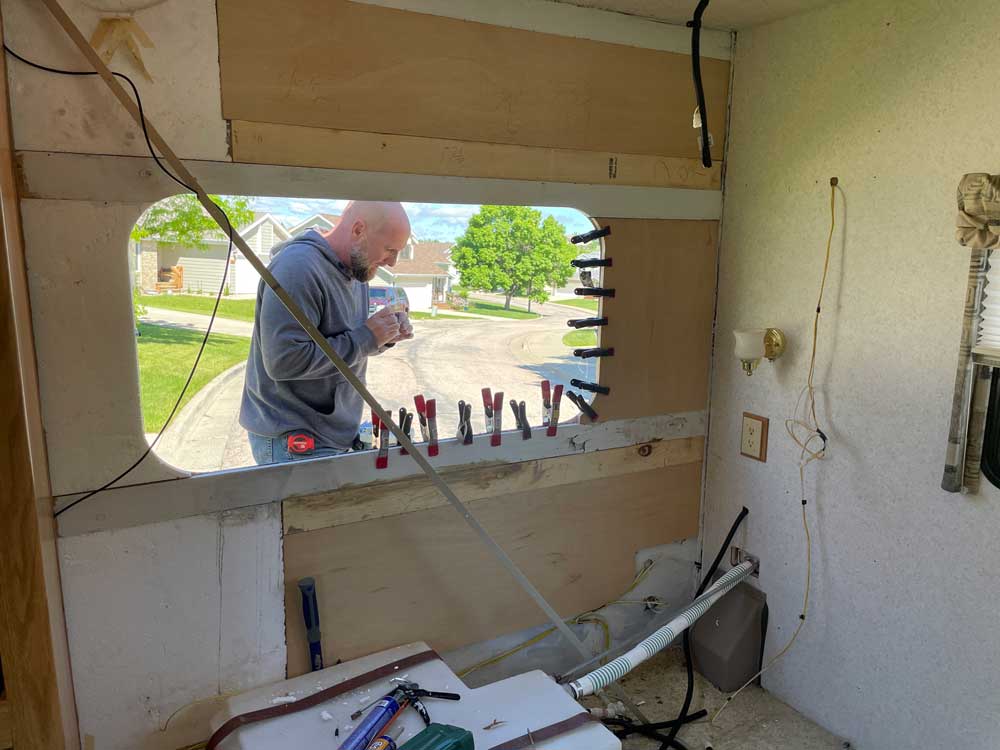
6. Install New Wall
- Attach new 1×4 support boards with 1.5” screws.
- Install replacement foam board insulation.
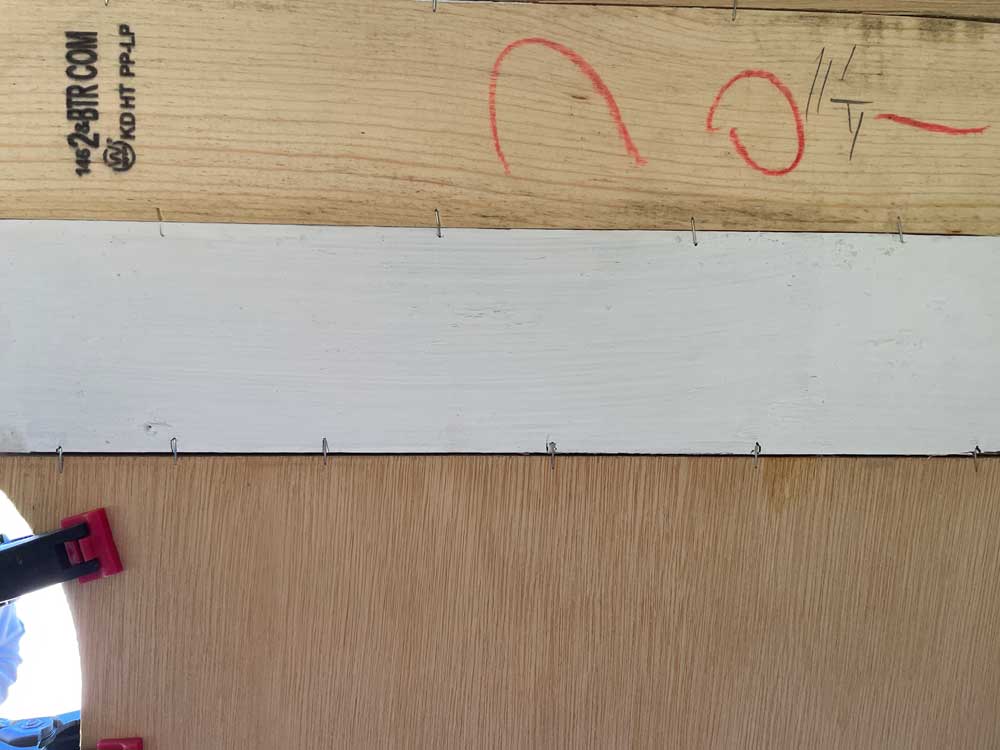
- Cut and shape 1/8” plywood over insulation.
- Staple joins for reinforcement (we avoided screws through the exterior to preserve the water seal).
- Cut and screw 1/8” hardboard paneling to cover the wall.
7. Reassemble
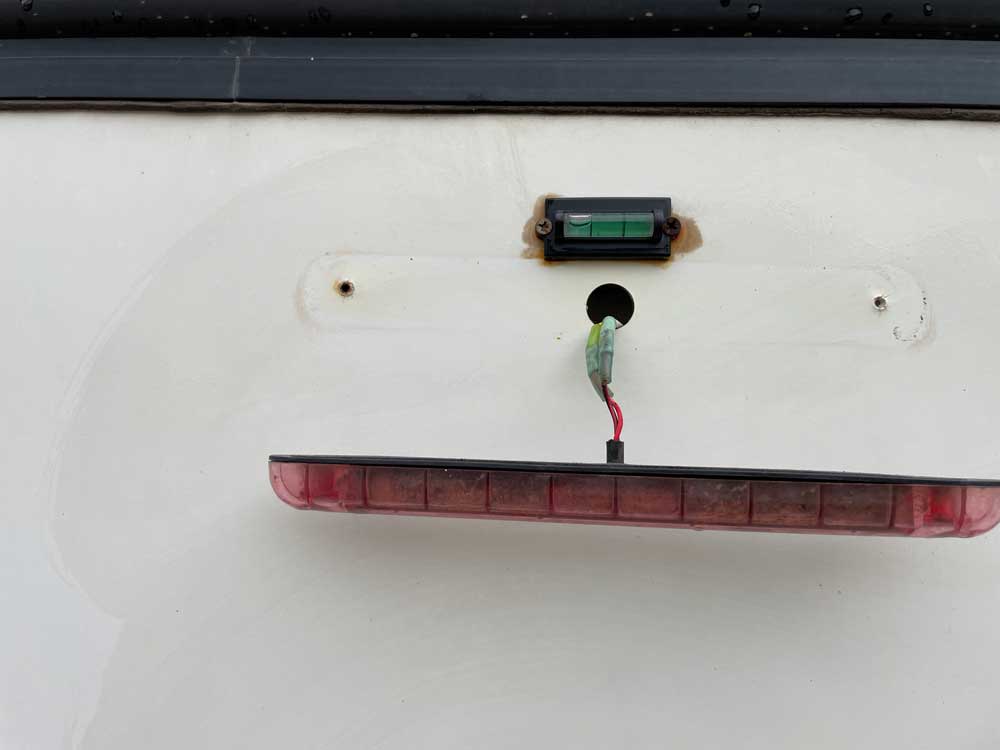
- Reinstall the window according to your RV’s window type.
- You may decide to paint your wall at this point. (we did not due to time constraints but I wish we would have.)
- Place and reattach all the furniture cabinets and fixtures back in place.
Watch the Process
Check out our video for a look at the damage and repair:
Lessons Learned
If we’d known how to spot mold and rot upfront, we’d have saved time and money. Hindsight, right? The silver lining: we fixed the back wall last spring, and it’s solid with no mold smell as of this update 2 years later.
What’s Next for the Minnie Winnie?
We’re monitoring the driver-side delamination, sealed with Eternabond for now. If it worsens, we’ll call in pros (like the Class C renovation folks here). Recently, Mark found a cracked linoleum floor, but the subfloor is dry with no leaks. We’re diving into another renovation to replace the floor and finally paint that ugly back wall.
Have you tackled RV mold or rot? Drop a comment or ask a question—I’d love to hear from you!
As an Amazon Associate, I earn from qualifying purchases at no extra cost to you. Thank you for your support!


Use screws or adhesive (depending on the patch material) to secure the patch in place. If using screws, countersink them slightly below the surface.
Bleach does not kill mold, especially om porous surfaces like wood. I’m not sure why you’re suggesting using it.
Hi Ash,
Thank you so much for your comment and for bringing this up! You’re absolutely right that bleach isn’t the best choice for killing mold on porous surfaces like wood, as it doesn’t penetrate deeply and can sometimes leave moisture behind, which mold loves. I really appreciate you pointing this out—it’s such an important topic for anyone tackling RV renovations!
In the original post, I shared what we did at the time (spraying a bleach-water mix), but after digging deeper and learning from feedback like yours and others on my YouTube video, I finally updated the post with better options for porous surfaces. Now, it recommends using hydrogen peroxide, white vinegar, or commercial mold removers, which are more effective for materials like RV wood or insulation. These penetrate better and reduce the risk of leftover moisture.
Happy Camping!