Baking Hacks for Beginners: Save Time & Stress in the Kitchen
Welcome to my cozy corner of the internet, where we’re all about making baking fun, approachable, and stress-free! If you’re new to baking or just looking to streamline your time in the kitchen, this post is for you. Today, I’m sharing my favorite baking hacks for beginners—a mix of classic tricks and lesser-known gems that will save you time, reduce frustration, and help you whip up delicious treats with ease. Let’s dive into these game-changing tips that’ll have you baking like a pro in no time!
1. Soften Butter in a Flash
We’ve all been there: you’re ready to bake, but your butter is still rock-hard from the fridge. Instead of waiting an hour (or risking a melty mess in the microwave), try this classic hack, one of the best baking hacks for beginners: Cut the butter into small cubes and place them on a plate for 10-15 minutes. The smaller pieces soften much faster.
For an even quicker trick (and a lesser-known gem), grate cold butter using a cheese grater. The thin shreds will soften in just a few minutes, perfect for creaming into cookie dough or cake batter. Bonus: This also ensures even distribution in recipes like scones or pie crusts!

2. Use a Scale for Precision (and Fewer Dishes!)
One of the best ways to save time and improve your baking is to invest in a kitchen scale. Measuring ingredients by weight (in grams or ounces) is not only more accurate than using cups, but it also cuts down on cleanup. No more juggling multiple measuring cups—just pour directly into your mixing bowl!
Pro tip: If you’re not ready to go full-scale yet, try the spoon-and-level method for flour. Spoon flour into your measuring cup, then level it off with a knife. This prevents packing too much flour, which can lead to dense cakes or tough cookies. It’s a simple hack that makes a big difference.

3. Freeze Cookie Dough for Instant Baking
Want fresh-baked cookies without the prep? This classic hack is a lifesaver: Scoop your cookie dough into balls, place them on a baking sheet, and freeze until solid. Transfer the dough balls to a freezer bag, and you’ve got ready-to-bake cookies whenever the craving strikes. Just add a minute or two to the baking time—no thawing required!
For a lesser-known twist, try freezing sliced cookie dough for cut-out cookies. Roll out your dough between parchment paper, cut into shapes, and freeze the entire sheet. When you’re ready to bake, pop the frozen shapes onto a baking sheet. This saves you from wrestling with sticky dough later!


4. Line with Silicone Liners or Parchment for Easy Cleanup
Lining your baking sheets is a game-changer for hassle-free baking, and you’ve got two fantastic options: silicone baking liners and parchment paper. This classic hack saves time and eliminates scrubbing stuck-on messes. Silicone liners are reusable, non-stick mats designed specifically for baking sheets—perfect for cookies, scones, or roasted treats. Just place one on your sheet, and almost all baked goods will slide right off, no greasing needed. If you prefer parchment paper, it’s a versatile choice for baking sheets and other pans (like 9x13s or round cake pans). Simply cut or fold it to fit, and you’re set for brownies, cakes, or bars. Both options make cleanup a breeze and ensure your treats don’t stick!
You can also try using pre-cut parchment sheets for baking sheets to save even more time. These come sized for standard half-sheet pans, so you can skip the hassle of cutting or curling edges. If you’re using silicone liners, store them flat or loosely rolled in a drawer to keep them in top shape for countless bakes. Whether you go with silicone for eco-friendly baking or parchment for flexibility, you’ll wonder how you ever baked without them!

5. Simplify Egg Separating
Separating eggs can be intimidating for beginners, but it doesn’t have to be. The classic method is to crack the egg and pass the yolk between the shell halves, letting the white drip into a bowl. But if you’re nervous about breaking the yolk, try this lesser-known hack: Crack the egg into a small bowl, then use a clean, empty water bottle. Gently squeeze the bottle, place the opening over the yolk, and release—the yolk will get sucked right up, leaving the white behind. It’s fast, fun, and foolproof!


6. Make Your Own Buttermilk
Forgot to buy buttermilk? No problem! This classic hack saves the day: Add 1 tablespoon of white vinegar or lemon juice to a 1-cup measuring cup, then fill it with milk. Let it sit for 5-10 minutes, and voilà—homemade buttermilk! It’s perfect for fluffy pancakes or tender cakes when you’re in a pinch.
You may also swap in plain yogurt or sour cream thinned with a little milk. Mix ¾ cup yogurt or sour cream with ¼ cup milk (or water) to replace 1 cup of buttermilk. This adds a rich, tangy flavor to quick breads or muffins.
Another fantastic option is to create your own buttermilk from a culture or store-bought buttermilk for a true homemade touch. Simply mix 1/4 cup of store-bought buttermilk (or a buttermilk starter culture) with 1 quart of milk, let it sit at room temperature for 12-24 hours until thickened, and you’ll have a fresh batch ready to use or store! Check out my detailed guide on How to Make Cultured Buttermilk for step-by-step instructions. These tricks ensure you’re never caught without buttermilk again!

7. Speed Up Cooling with a Fridge Swap
Waiting for cakes or cookies to cool can feel like forever, especially when you’re eager to frost or decorate. A classic hack is to place your baked goods on a wire rack to cool faster. But for an even quicker cooldown, slide the entire rack into the fridge for 10-15 minutes. Just make sure there’s enough space and no strong odors in there! This hack is a game-changer when you’re racing against the clock.

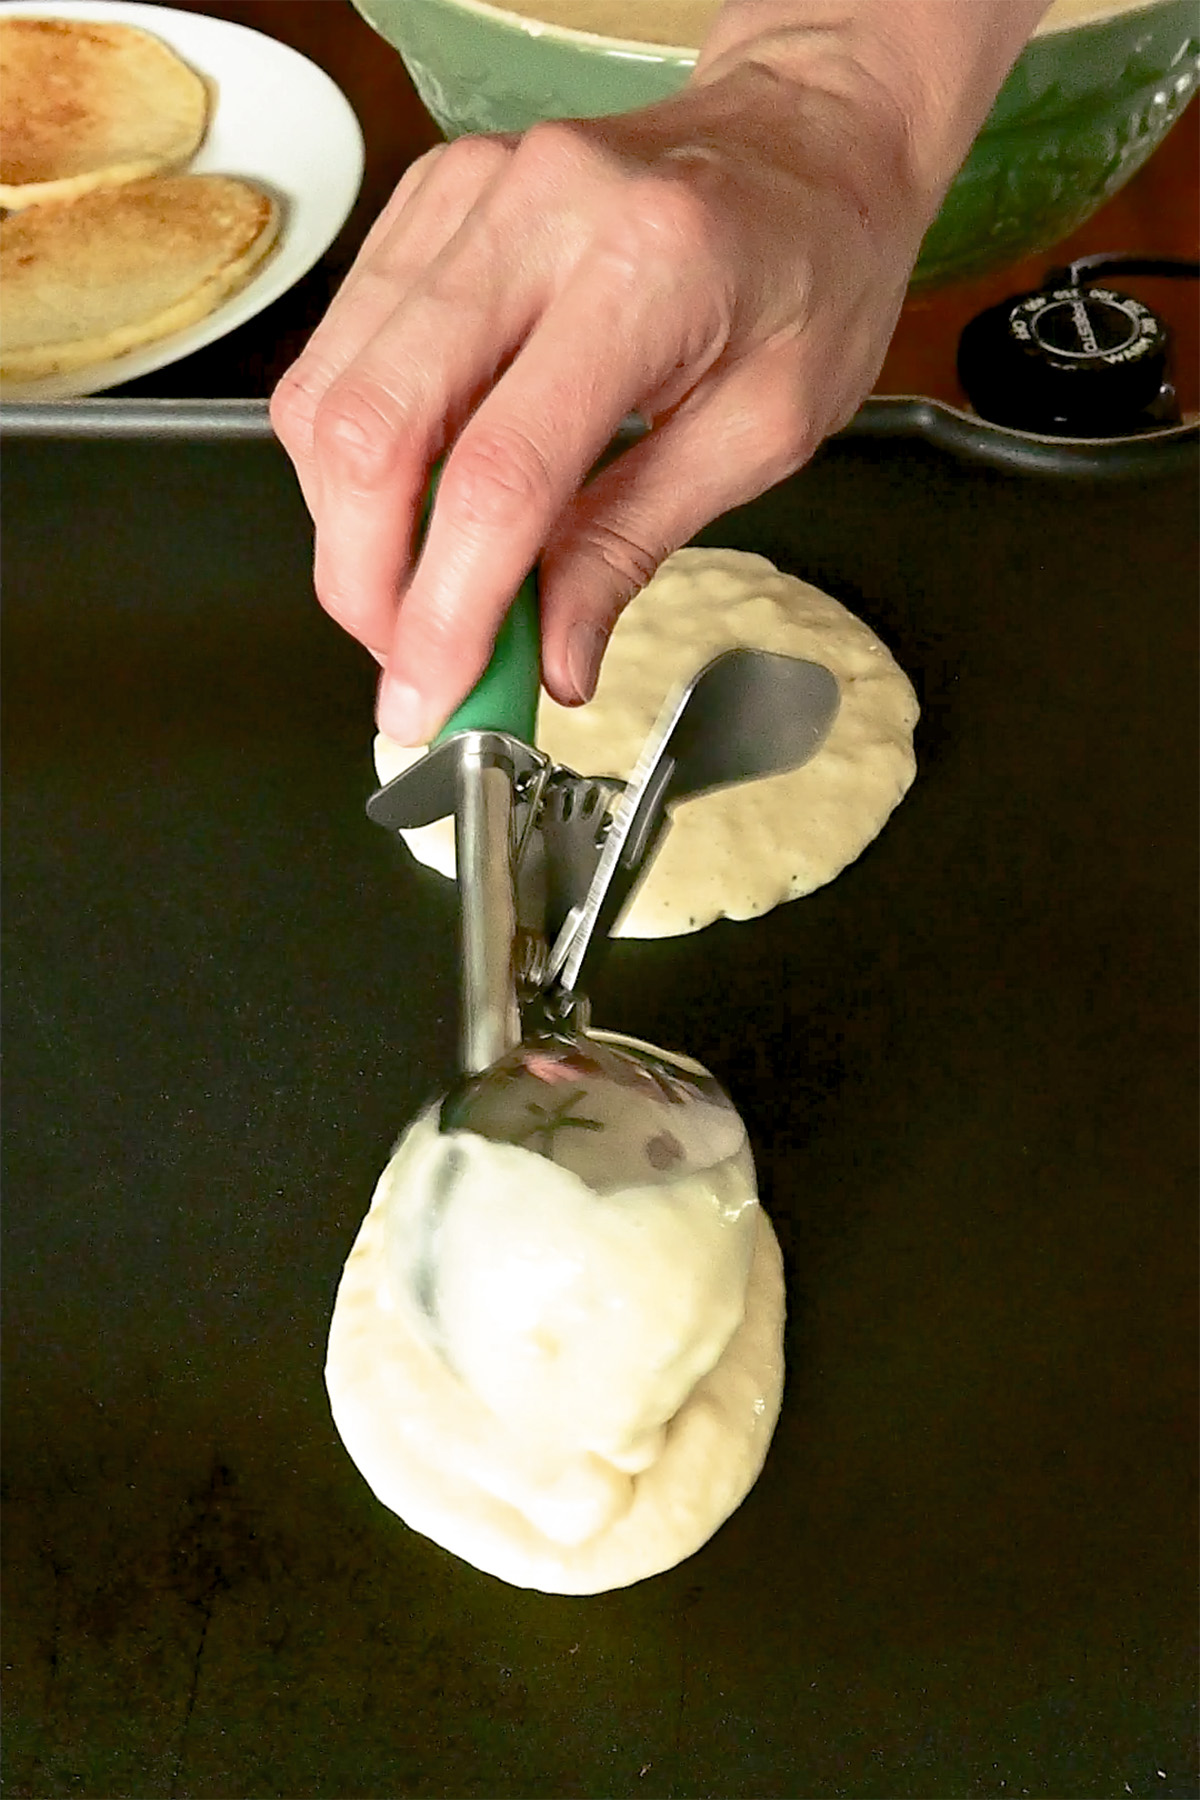
8. Use a Cookie Scoop for Uniform Treats
Want perfectly shaped cookies or muffins without the mess? A cookie scoop is your secret weapon. This classic tool ensures even portions, which means your treats bake evenly too. Plus, it’s way faster than spooning dough by hand.
You can use your cookie scoop for more than just cookies! It’s great for portioning muffin batter, pancake batter, cupcake batter, or even meatballs for dinner. Choose a 1, 2, & 3 tablespoon scoop set for versatility.
9. Revive Stale Brown Sugar
Hard-as-a-rock brown sugar can derail your baking plans, but don’t toss it! The classic fix is to place a slice of bread or an apple wedge in the bag or container and seal it overnight—the sugar will absorb the moisture and soften up.
For a faster softening microwave the brown sugar in a bowl with a damp paper towel draped over it for 20-30 seconds. Check and repeat if needed, but be careful not to melt it. You’ll be back to baking in minutes!

10. Bring Eggs to Room Temp in Minutes
Cold eggs straight from the fridge can throw off your baking, but you don’t have to wait 30 minutes for them to warm up! This classic hack is a time-saver: Place your cold eggs in a bowl and cover them with warm (not hot!) tap water. Let them sit for 5–10 minutes, and they’ll be at room temperature, ready for your recipe. This trick is perfect for recipes that need room-temp eggs, like butter-based cakes, pound cakes, custards (such as crème brûlée), and emulsified batters (like for fluffy pancakes or creamy cheesecakes), where warm eggs blend more smoothly and help create a light, even texture.
Try adding a pinch of baking soda to the warm water (about ⅛ teaspoon per cup) to speed up the process slightly, especially for extra-cold eggs. The baking soda raises the water’s pH, helping the eggs warm up evenly in as little as 4–6 minutes. Just rinse the eggs lightly before cracking to remove any residue. This hack ensures you’re ready to bake without delay, keeping your kitchen rhythm smooth and stress-free!

11. Make Your Own Brown Sugar (Light or Dark!)
Running out of brown sugar? You can make your own in minutes with just two ingredients: granulated sugar and molasses! This classic hack, one of my favorite baking hacks for beginners, is a lifesaver when you’re mid-recipe.
- Old-Fashioned Unsulfered Molasses
- Light Brown Sugar:
- Mix 200 grams (1 cup) of granulated sugar with 9 grams (¾ tablespoon or 2¼ teaspoons) of OF molasses for a balanced, caramel-like flavor.
- Dark Brown Sugar:
- Mix 200 grams (1 cup) of granulated sugar with 18 grams (1½ tablespoons) of OF molasses for a richer, deeper taste.
- Light Brown Sugar:
- Sulfered Molasses
- Light Brown Sugar:
- Mix 200 grams (1 cup) of granulated sugar with 7 grams (½ tablespoon or 1½ teaspoons) of sulfered molasses for light brown sugar
- Dark Brown Sugar:
- Mix 200 grams (1 cup) of granulated sugar with grams (1 tablespoon) of sulfered molasses to avoid an overpowering flavor.
- Light Brown Sugar:
Stir with a fork until fully combined, and your fresh brown sugar is ready to use! Whip up multiple batches using a stand mixer to save time and ensure a smooth texture. Use the paddle attachment on low speed for 1–2 minutes until evenly blended, scraping down the sides as needed. Store your batch in an airtight container for weeks—perfect for holiday baking! The stand mixer makes quick work of blending the sticky molasses, getting you back to baking faster.

Final Thoughts on These Baking Hacks for Beginners
Baking doesn’t have to be time-consuming or stressful, even if you’re just starting out. With these baking hacks for beginners—both the tried-and-true classics and a few under-the-radar tricks—you’ll save time, reduce cleanup, and boost your confidence in the kitchen. Try one or two of these tips in your next baking adventure, and let me know how it goes! What’s your favorite baking shortcut? Drop it in the comments below—I’d love to hear from you.
Want some easy beginner-friendly recipes? Check out my Oatmeal Chocolate Chip Cookies and our favorite Buttermilk Pancakes perfect for putting these hacks to the test!
Happy Baking!
As an Amazon Associate, I earn from qualifying purchases at no extra cost to you. Thank you for your support!
Julie,
Just wanted to let you know that I spent all day yesterday looking at cookbook templates, mostly looking for recipes that put pictures in different places on the page, and for an index to go with the ever-so-limited Table of Contents. Then wouldn’t you know it, but I found you on youtube and you sounded like me – someone who knows what she wants, and wants a wee bit more for the effort than most others. Anyway, out of a whole day’s investigating of various templates, I finally settled on two book templates from the same designer, but was still looking for an index – ANY INDEX – in vain.
Anyway, thank you for both some insightful publishing tips and great kitchen hacks!
ashley
Hi Ashley!
Wow, I feel you on the cookbook template hunt—what a journey! I’m thrilled you stumbled across my YouTube video. It’s so rewarding to hear from someone who’s just as particular about getting those details right. Congrats finding templates that you’re happy with! I totally get the index struggle; it’s such a vital part of making a cookbook user-friendly.
Thanks so much for the kind words about the kitchen hacks! Happy cooking and creating!
Julie just became aware of your site. It’s fabulous! Will be using it.
Hi Aunt Mary! Thank you so much for the sweet words! I’m thrilled you like it. Can’t wait to hear what you bake first! 😘