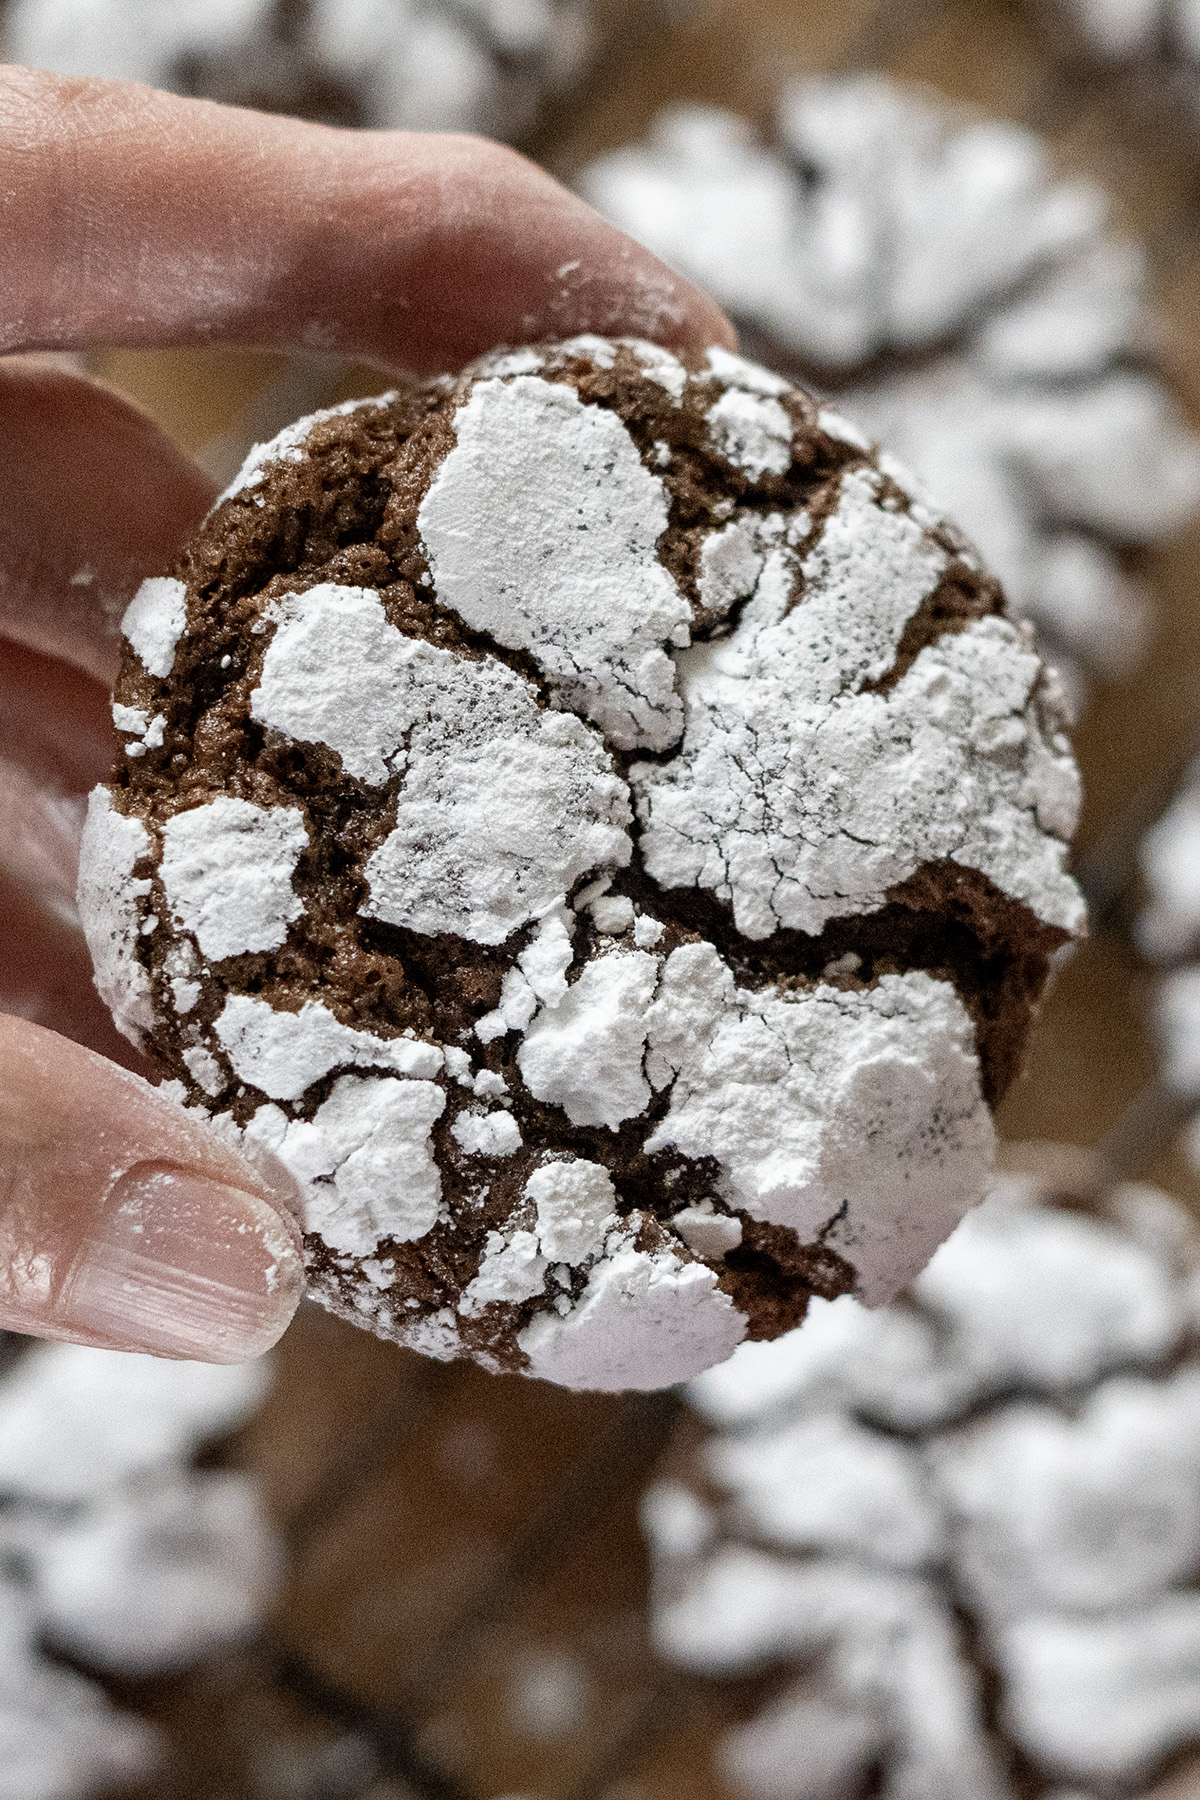
Easter Sugar Cookies with Honey Royal Icing
Say hello to your new Easter obsession: soft, no-spread sugar cookies topped with honey royal icing that’s a breeze to decorate—perfect for beginners or a fun family baking day!

Let’s bake Easter sugar cookies with honey royal icing that’ll steal the show this spring! The dough is buttery, rolls out like a dream, and holds every cute shape—bunnies, eggs, chicks, you name it. I’ve swapped corn syrup for honey in the icing for a matte finish that’s easy to pipe and oh-so-pretty. This recipe’s a fresh take on a family favorite, and I love spreading it over a few days for stress-free fun. Whether you’re hosting brunch or just craving a sweet project, these cookies are your ticket—let’s get started!
This Recipe for Easter Sugar Cookies with Honey Royal Icing Is:
- No-spread—crisp, perfect shapes every time
- Simple to decorate with honey icing
- Great for all skill levels—kid-friendly too
- Make-ahead friendly—bake on your schedule

Overview: How to Make Easter Sugar Cookies with Honey Royal Icing
- Mix and chill a buttery dough for 30 minutes.
- Roll, cut, and bake until lightly golden—16-20 minutes.
- Whip honey royal icing, thin to 20 seconds, and decorate.
- Let dry 6-12 hours uncovered for a perfect finish.
Easter Sugar Cookie Ingredients
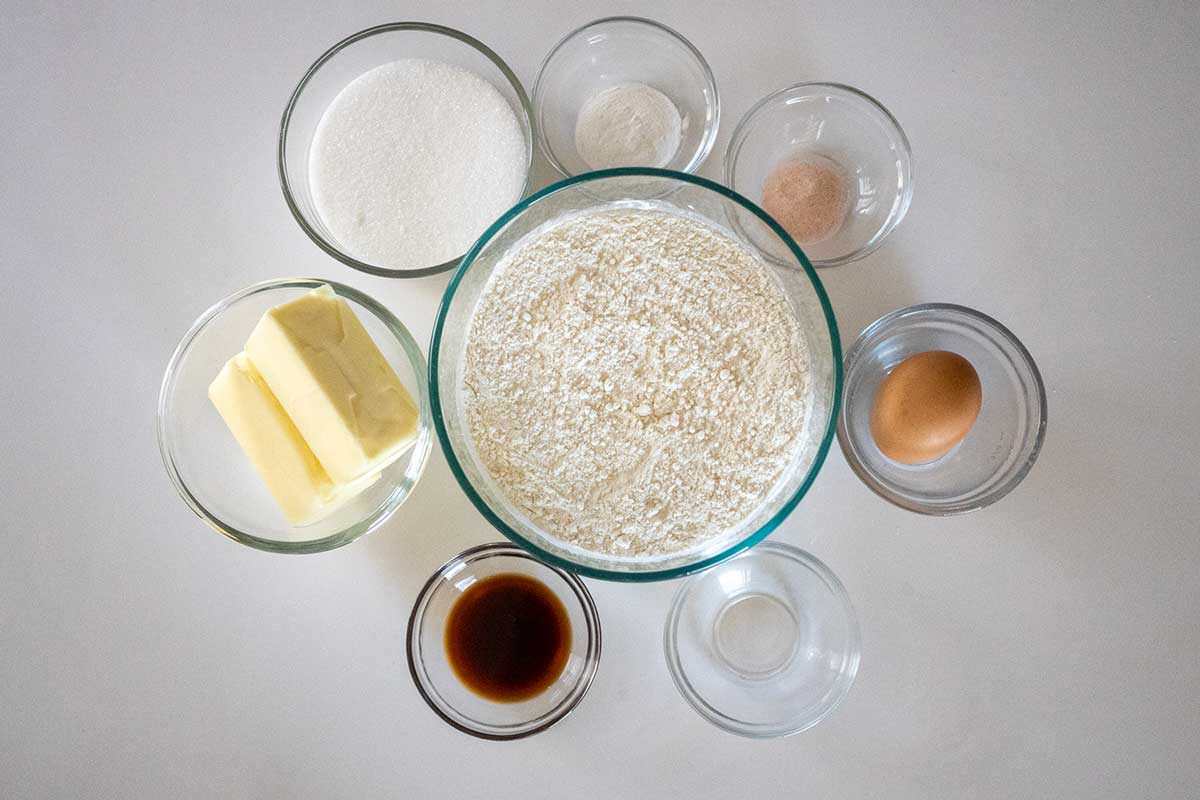
Yields 2-3 dozen cookies (depending on cutter size).
- 3 cups (375g) all-purpose flour – Weigh for accuracy
- 1 tsp baking powder – Keeps them soft
- ½ tsp salt – Balances sweetness
- 1 cup (2 sticks or 226g) unsalted butter, softened – Room temp, not melted
- 1 cup (200g) granulated sugar – Classic cookie sweetness
- 1 large egg – Binds it together
- 1 tbsp vanilla extract – Pure for best flavor
- 1 tsp almond extract – No sugar cookies should be without it – IMHO
Honey Royal Icing Ingredients
Covers 2-3 dozen cookies—half it for smaller batches like my Valentine’s Hearts (insert-link).
- 4 cups (480g) powdered sugar – No sifting unless clumpy
- 2 tbsp meringue powder – For structure
- 5 tbsp warm water – Adjust as needed
- 2 tbsp honey – My twist (or corn syrup for shine)
- 1 tsp vanilla extract – Warmth in every bite
- 1 ½ tsp almond extract – Extra flavor pop
- Gel food coloring – Pastel shades from Hobby Lobby

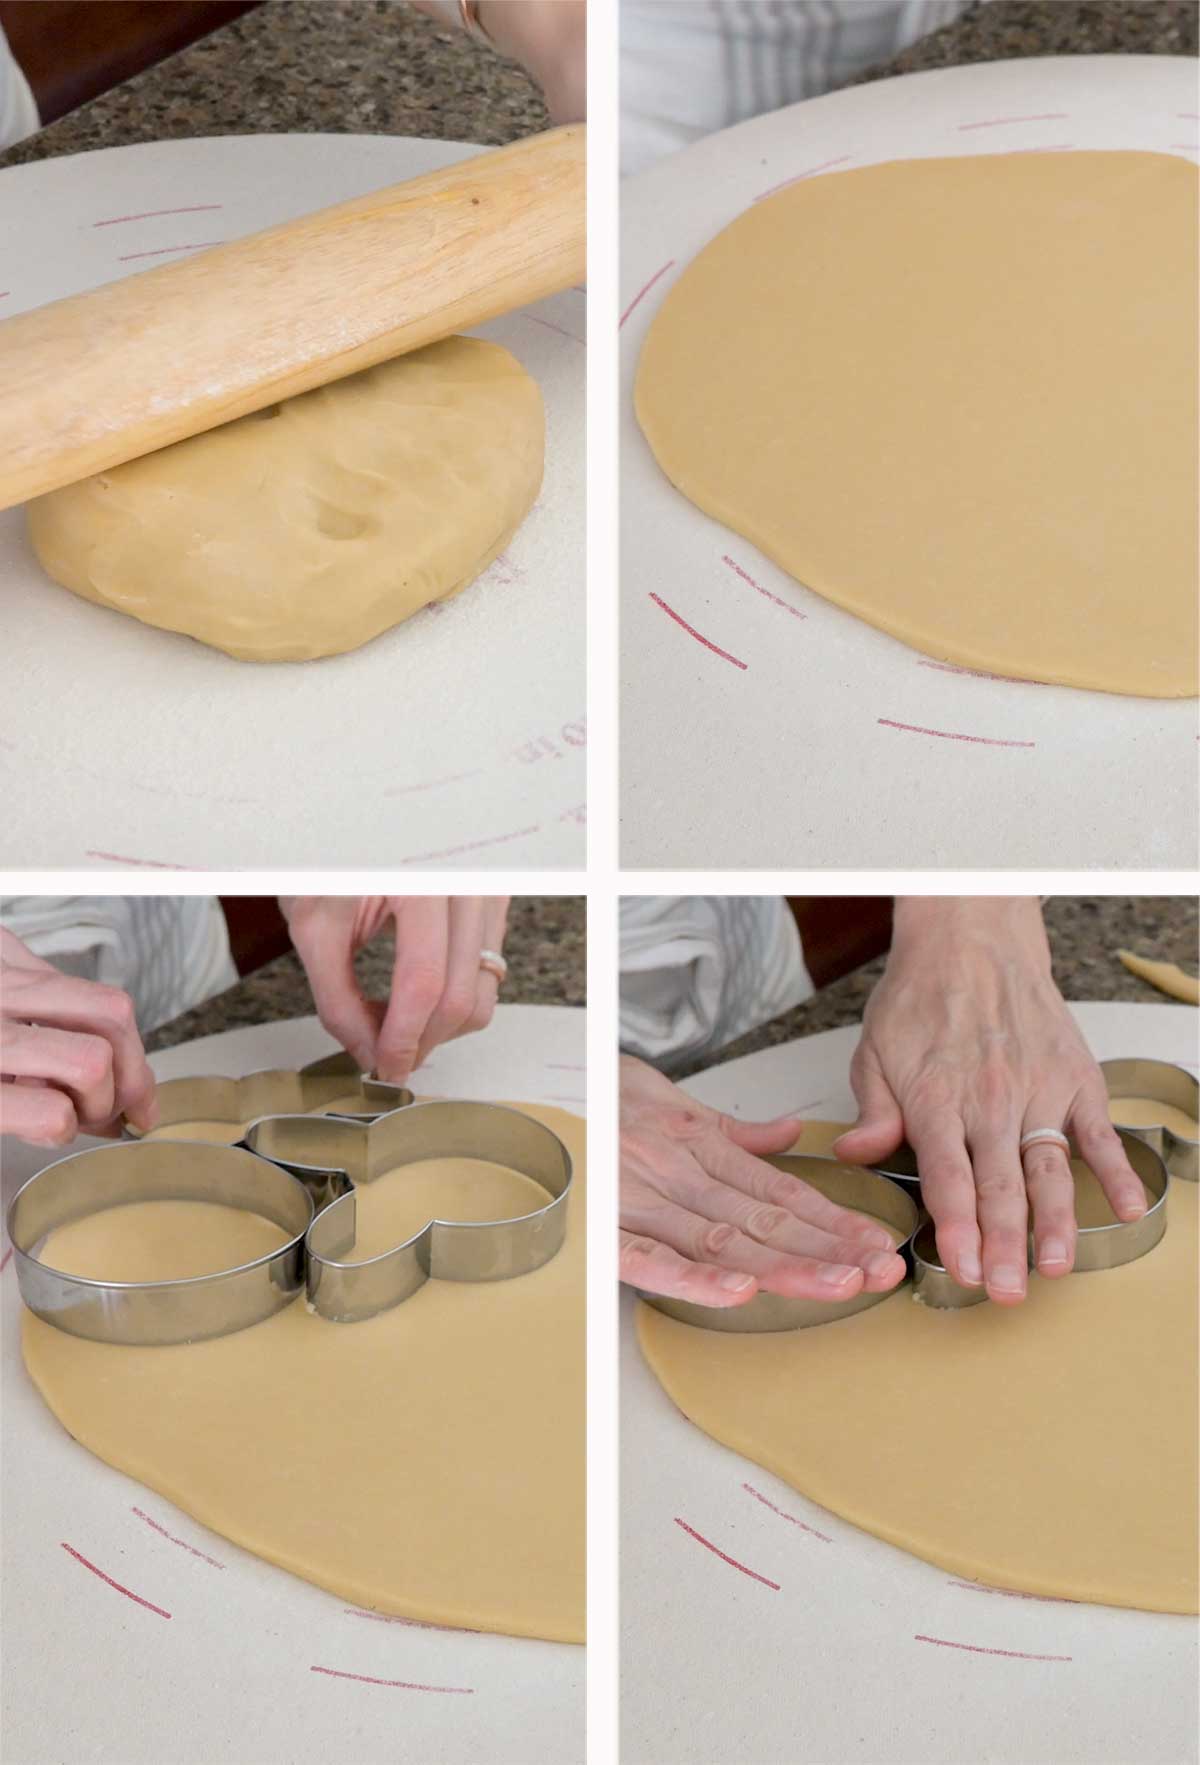
How to Make No-Spread Easter Sugar Cookies
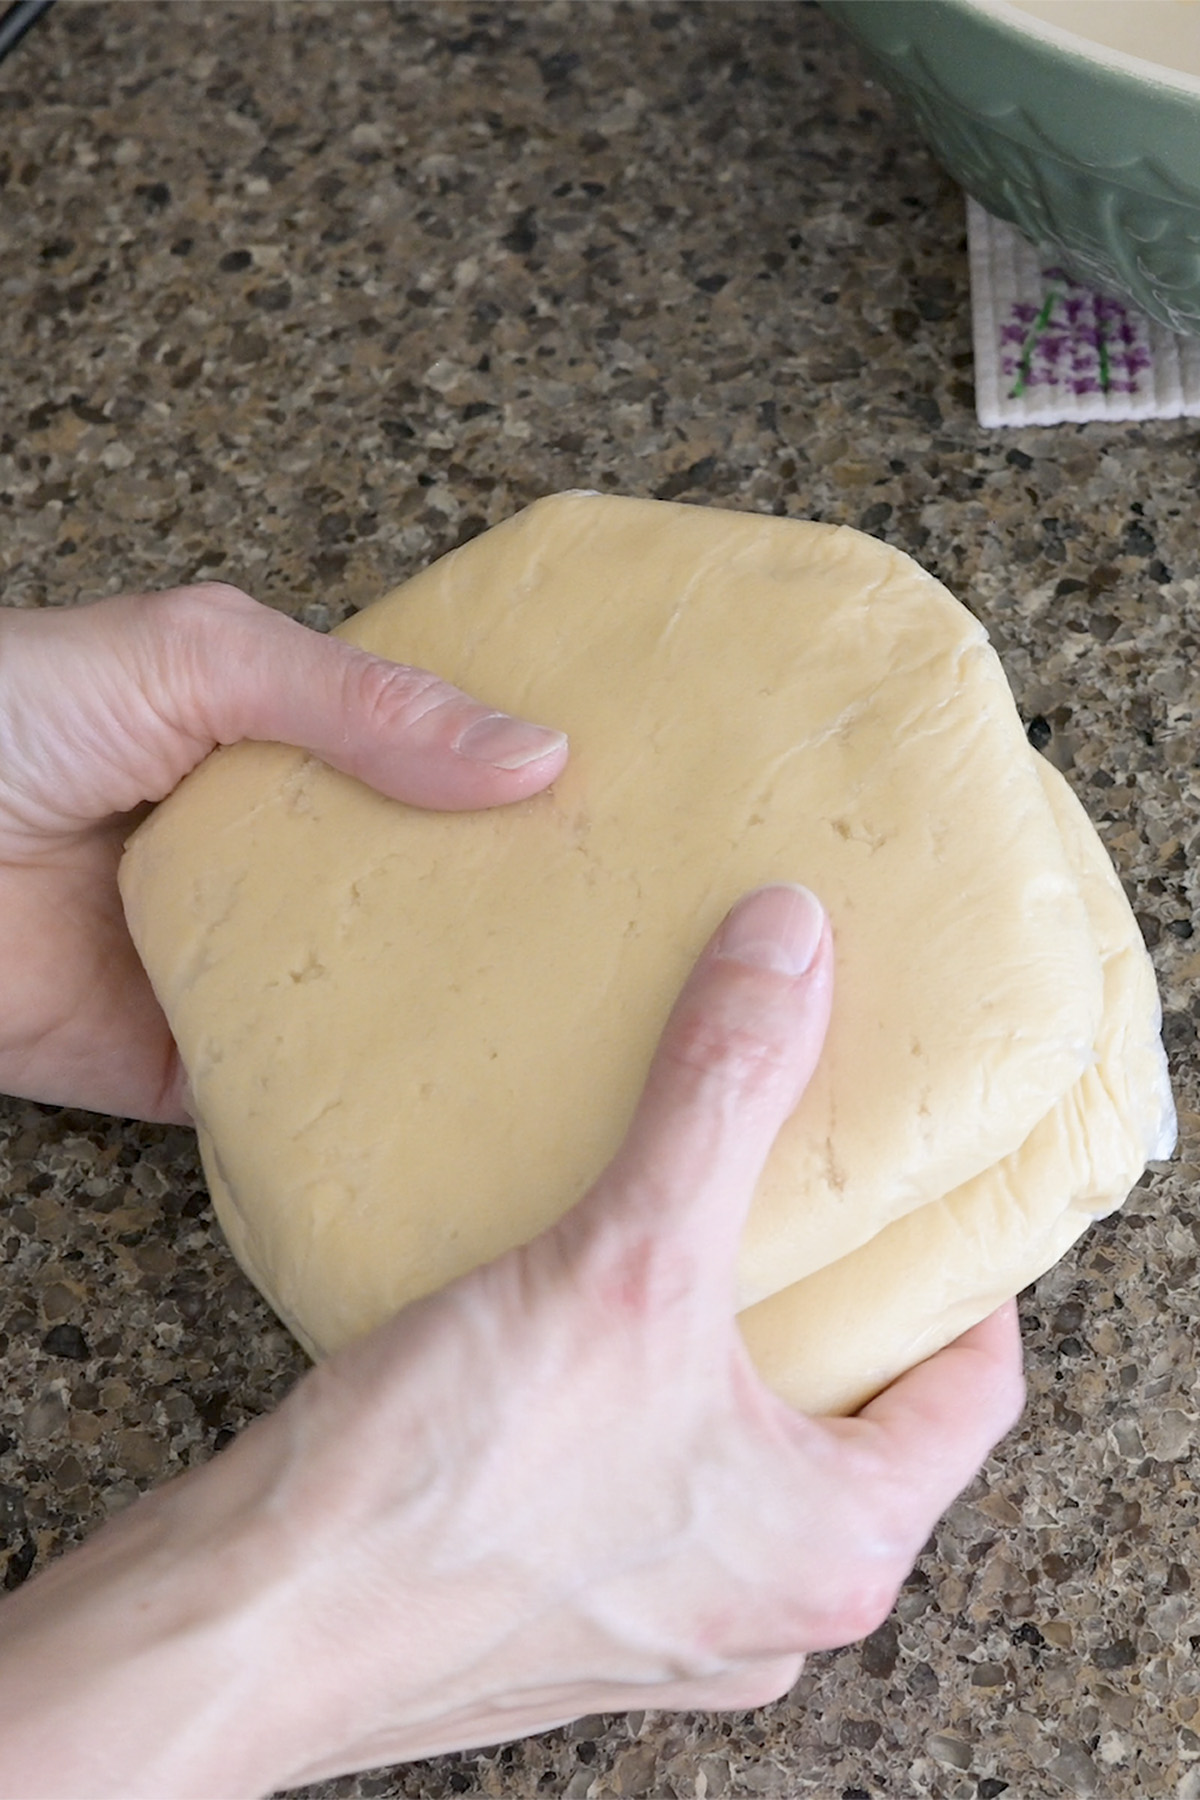
No more shapeless cookies! Chill this dough for 30 to an hour knead if stiff, and roll to ¼-inch thick on a Bethany House Pastry Board —barely any flour needed. Bake at 350°F for 16-20 minutes until edges are lightly golden. Rework scraps into the next batch—they stay tender and tasty!
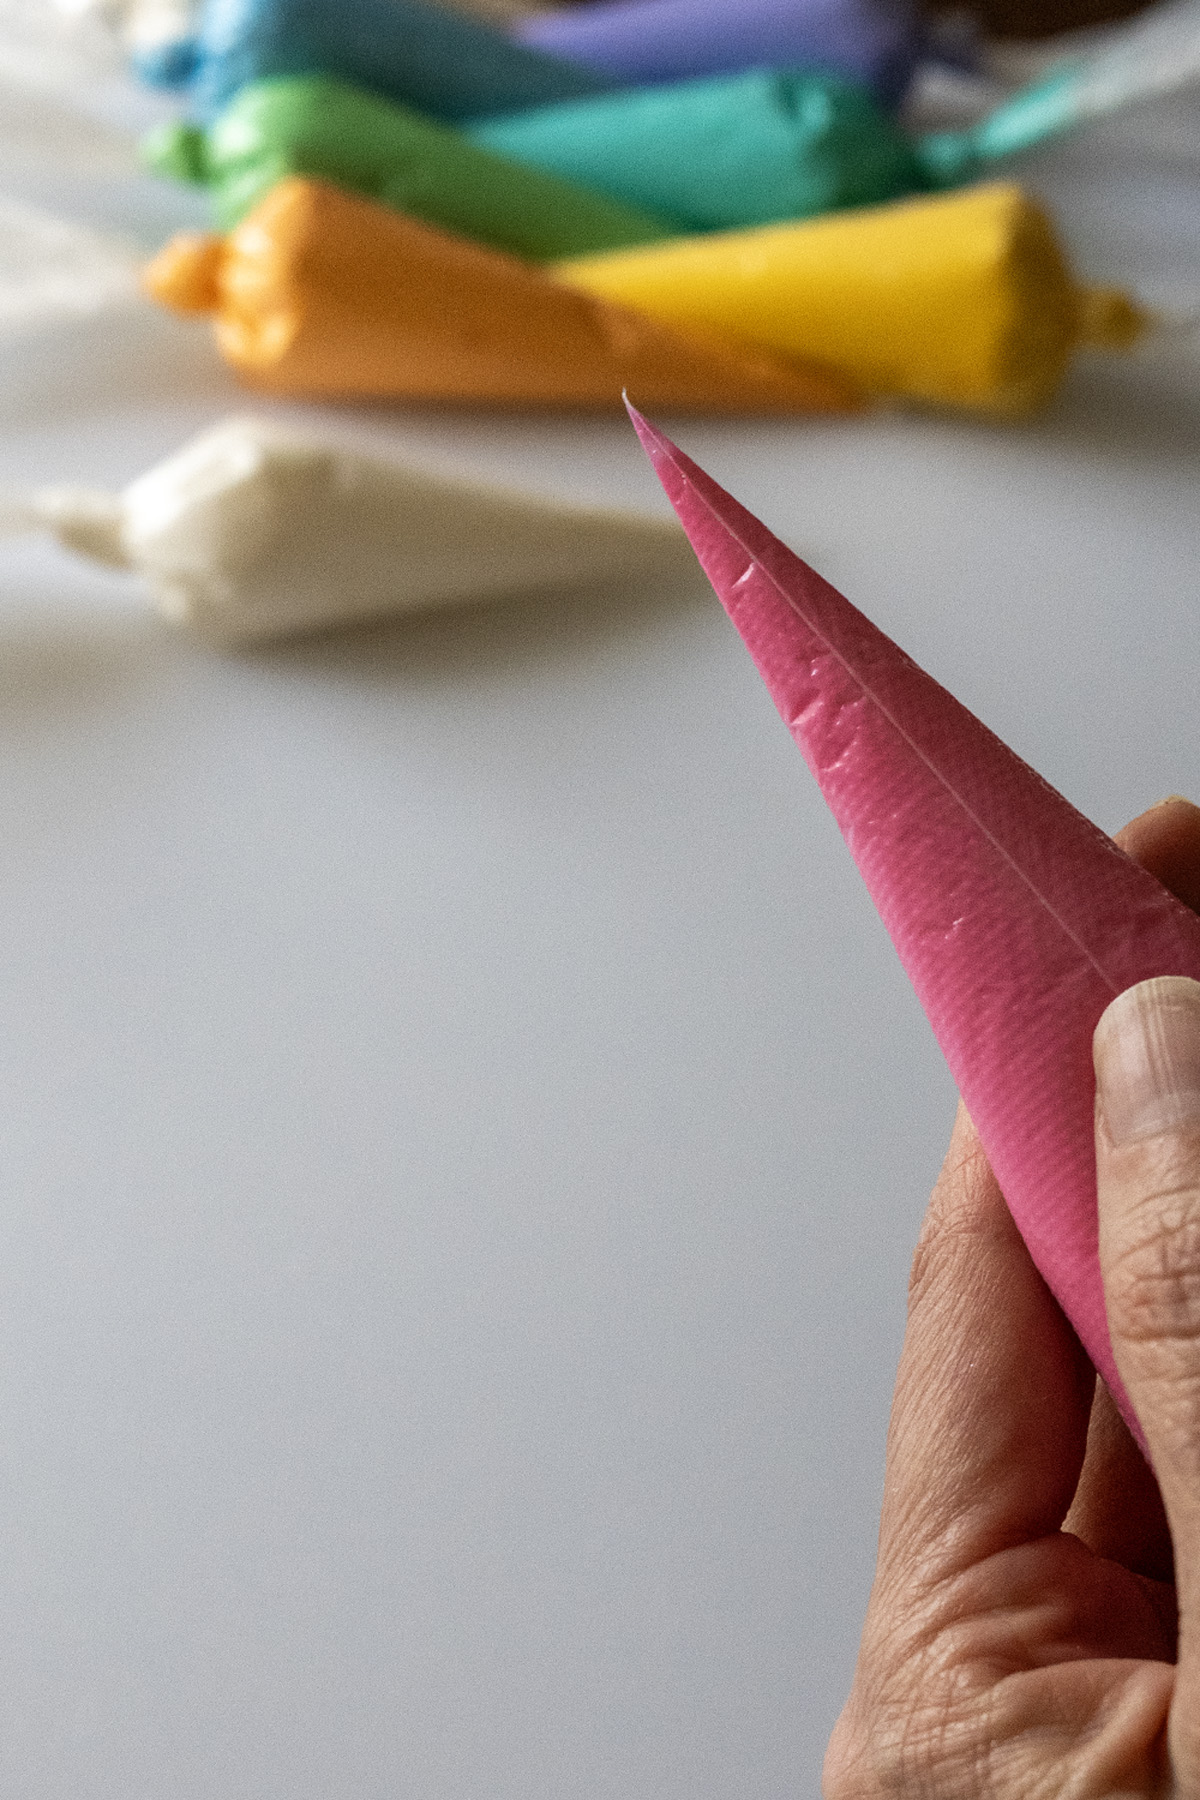
How to Pipe Honey Royal Icing Without Divots
Center the seam on your tipless piping bag, snip a small tip for a circle, and outline your cookie—keep the tip just above the surface for a smooth line, then tidy edges with a toothpick. Flood with 20-23-second icing, tap and shake to smooth it. For details, eagle eyes might spot my divots—too late for mine, but not yours! HOMEgirl Cookies’ YouTube video says divots happen when piping onto a fully dry base. Pipe on a tacky layer to skip craters, or poke holes with a toothpick on a dry base to fill cavities and stop moisture loss.
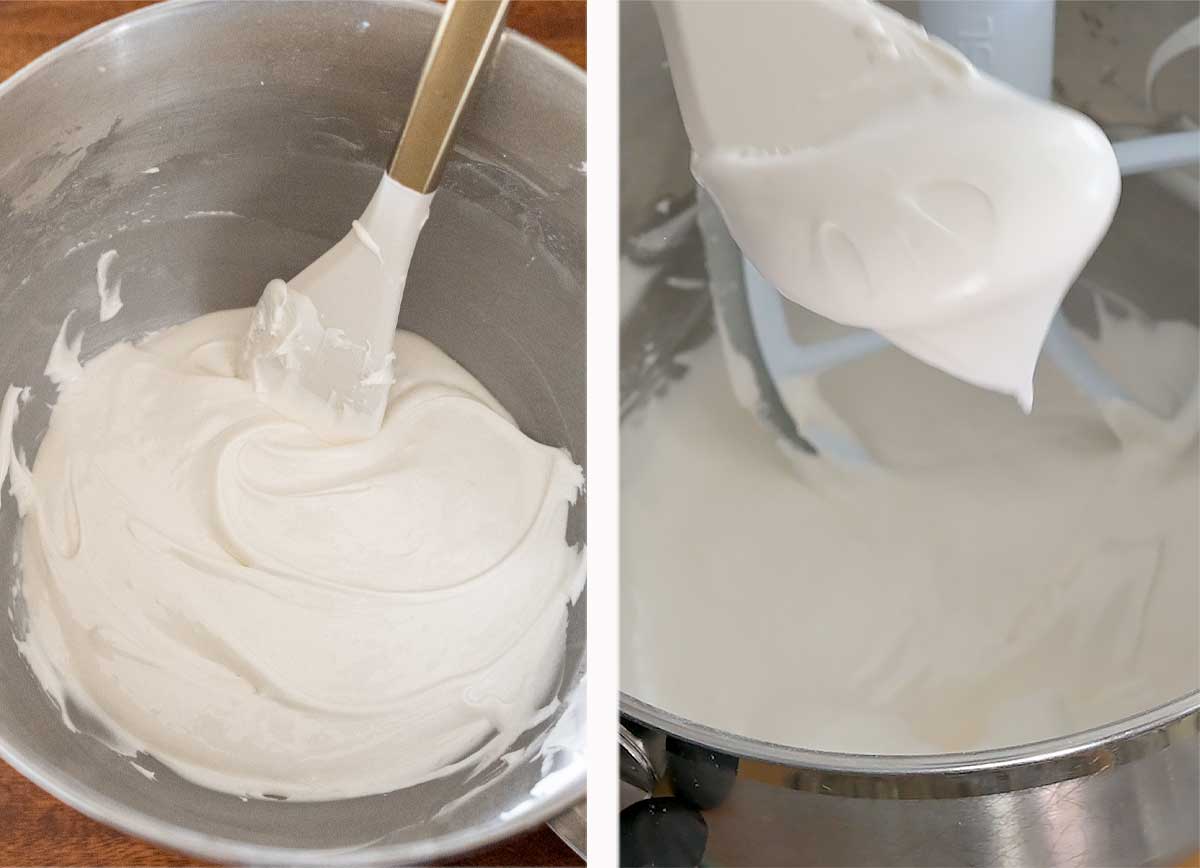
Royal Icing Consistencies Dipping, Flooding, and Piping
Grab gloves—it gets messy! ‘Second’ icing means how long a line takes to disappear when you draw it with a knife—easy to check! I love 20-23 seconds for soft piping and smooth flooding. Thin the whole batch in the bowl with ¼ tsp. water at a time, then scoop and color with gel (mine’s from Hobby Lobby, $1 on sale!). Or scoop out bits, thin separately—or use a spray bottle for tweaks—and color. Swing icing to the tip and tie off. Wait overnight for raised details—clip bags with a clothes pin and store at room temp.
Dipping (10-12 Seconds)
Thin like warm honey—dip cookies for a quick, smooth coat. Line disappears in 10-12 seconds. Great for solid pastel bases; let excess drip off over a rack.
Flooding (15-20 Seconds)
Flows like thick syrup—fills outlines perfectly. Line settles in 15-20 seconds. Use a toothpick to smooth it out—I lean toward 20 for versatility.
Piping (25-30 Seconds)
Thick like toothpaste—holds fine lines or peaks. Line takes 25-30 seconds to melt back. Ideal for details like bunny tails over a dried base.
My Go-To (20-23 Seconds – Flood & Pipe)
Thick enough to pipe outlines, fluid enough to flood
Tip: Test on a plate—too runny? Add 1 tbsp powdered sugar. Too stiff? More water, drop by drop or use a spray bottle for even better control.
Can I Freeze Honey Royal Icing?
Yes—it’s a game-changer! Fill tip-less bags, clip shut with a clothes pin, and freeze up to 3 months. Thaw at room temp, massaging to blend settled color.

This Easter Sugar Cookie Recipe is Perfect If You:
- Love vanilla-almond vibes
- Want shape-holding cookies
- Prefer matte icing (or can tweak for shine)
- Skip complicated steps or gear
Equipment I Love for This Recipe
- Bethany House Pastry Board – Rolling’s effortless; shake the cloth clean, store in a zip-top bag in the freezer for tart crust , pie crust, or lefse
- KitchenAid Mixer – Whips icing like a dream
- Tipless Piping Bags – No-fuss decorating
- Easter Cookie Cutters – My faves!

Make-Ahead & Storage Tips
- Dough: Chill up to 2 days or freeze 3 months—thaw overnight in the fridge.
- Cookies: Bake ahead, freeze un-iced for 3 months in an airtight container.
- Icing: Mix a day early (cover at room temp) or freeze in bags—thaw and remix.
- Decorated Cookies: Store at room temp in an airtight container for 2 weeks—use parchment between layers.
More Easter Baking Recipes
- 2-Tier Carrot Cake with Cream Cheese Frosting
- No-Bake Easter Nests: Coming Soon!
- Creamy Vanilla Lemon Curd Tart
Conclusion
These Easter sugar cookies with honey royal icing are all about simple joy—soft cookies that hold their shape, topped with an icing that’s a cinch to pipe, even if you’re new to decorating. I love how the honey twist makes them unique, and spreading the process over days keeps it relaxed and fun. Whether you’re baking for Easter Sunday or just a sweet spring treat, this recipe’s got you covered—give it a whirl and let me know how it goes in the comments! Happy baking!
Easter Sugar Cookies with Honey Royal Icing
Print Recipe
equipment (affiliate links
Ingredients
For the Sugar Cookies:
- 3 c. (375 g) unbleached all-purpose flour (RECOMMEND WEIGHING)
- 1 tsp. baking powder
- ½ tsp. salt
- 1 c. (226 g) salted butter room temperature
- 1 c. (200 g) granulated sugar
- 1 large egg
- 1 tbsp. vanilla extract
- 1 tsp. almond extract optional but recommended
For the Honey Royal Icing:
- 4 c. (480 g) powdered sugar
- 2 tbsp. meringue powder
- 5 tbsp. water warm – adjust as needed for consistency
- 2 tbsp. honey or corn syrup for more shine
- 1 tsp. vanilla extract
- 1 ½ tsp. almond extract
- Gel food coloring – pastel shades
Instructions
- Make the Dough: In a medium bowl, whisk flour, baking powder, and salt. In a large bowl with an electric mixer, beat softened butter and sugar on medium-high until light and fluffy, about 2-3 minutes. Add the egg, vanilla, and almond extract—that almond’s my secret weapon!—and beat until smooth. Gradually mix in dry ingredients on low until a soft dough forms—don’t overmix.3 c. (375 g) unbleached all-purpose flour (RECOMMEND WEIGHING)1 tsp. baking powder½ tsp. salt1 c. (226 g) salted butter1 c. (200 g) granulated sugar1 large egg1 tbsp. vanilla extract1 tsp. almond extract
- Chill: Divide dough into 2 discs, wrap in plastic, and chill for 30 minutes—perfect time to tidy up and set your rolling station! If stiff later, knead it against the counter ‘til pliable.
- Roll & Cut: Preheat oven to 350°F (175°C) and line baking sheets with silicone mats or parchment. On a pastry board and cloth or a floured surface, roll one disc to ¼-inch thick—I eyeball it, but rolling pin rings work too (linked above). If dough sticks, scrape it off with a sharp knife. Cut out cookie shapes and place 2 inches apart on trays. Rework scraps into the next disc, brushing off extra flour—keeps going ‘til every bit’s used!
- Bake: Bake 16-20 minutes, until edges are lightly golden. Cool on trays 5 minutes, then transfer to a rack to cool completely.
- Make Honey Royal Icing: In a large bowl (I use my stand mixer), mix powdered sugar and meringue powder. In a small bowl, stir together warm water, honey, vanilla, and almond extract—that extra almond kick’s my favorite! Combine with dry ingredients and beat on low for 1 minute, then medium-high for 5-7 minutes until stiff peaks form—nice and tall!4 c. (480 g) powdered sugar2 tbsp. meringue powder5 tbsp. water2 tbsp. honey1 tsp. vanilla extract1 ½ tsp. almond extract
- Thin Icing: Grab gloves—it gets messy! For one consistency (my go-to 20-23 seconds—soft piping and easy flooding), thin the whole batch in the bowl with ¼ tsp. water at a time—a spray bottle helps with tiny tweaks—‘til a line disappears in 20-23 seconds when you draw it with a knife. Scoop out what you need and add gel coloring (mine are from Hobby Lobby). Or, scoop out bits for each color and thin separately. Swing icing into tipless bags, center the seam, snip a small tip, and tie off.Gel food coloring – pastel shades
- Decorate: Outline cookies with 20-23-second icing—keep the tip just above the surface for a smooth line, tidying edges with a toothpick. Flood the inside, tap and shake to smooth it. Add more icing while wet for color blends, or wait at least 1 hour (I do overnight) for raised details—clip bags with a clothes pin and store at room temp ‘til then. For divots on a dry base, poke tiny holes with a toothpick where you’ll pipe—keeps moisture in. Let dry 6-12 hours.
Notes
- Dough Tips: Chill for 30 minutes—no more, no less—or it gets tricky to roll. Knead scraps back in—they stay tender even after multiple rerolls! If it sticks to your pastry board, scrape it off with a sharp knife.
- Icing Consistencies: ‘Second’ means how long a line takes to disappear when drawn with a knife—easy to test!
- Dipping (10-12 sec): Thin like honey—dip for a quick coat.
- Flooding (15-20 sec): Flows like syrup—fills outlines smoothly.
- Piping (25-30 sec): Thick like toothpaste—perfect for raised details over a dried base.
- My Fave (20-23 sec): Great for soft piping and easy flooding—no need for separate batches!
- Divot Fix: Spot craters in details? Pipe on a tacky base to skip ‘em, or poke tiny holes with a toothpick on a dry base to keep moisture in.
- Glove Up: Coloring gets messy—grab gloves to keep hands clean!
- Make Ahead: Freeze dough or un-iced cookies for 3 months—thaw dough overnight in the fridge.
- Icing Storage: Clip cut piping bags with a clothes pin for overnight details at room temp, or freeze up to 3 months—massage to blend settled color after thawing.
- Shine Option: Swap honey for corn syrup if you want glossy icing.
As an Amazon Associate, I earn from qualifying purchases at no extra cost to you. Thank you for your support!