The BEST Recipe for Rosette Cookies
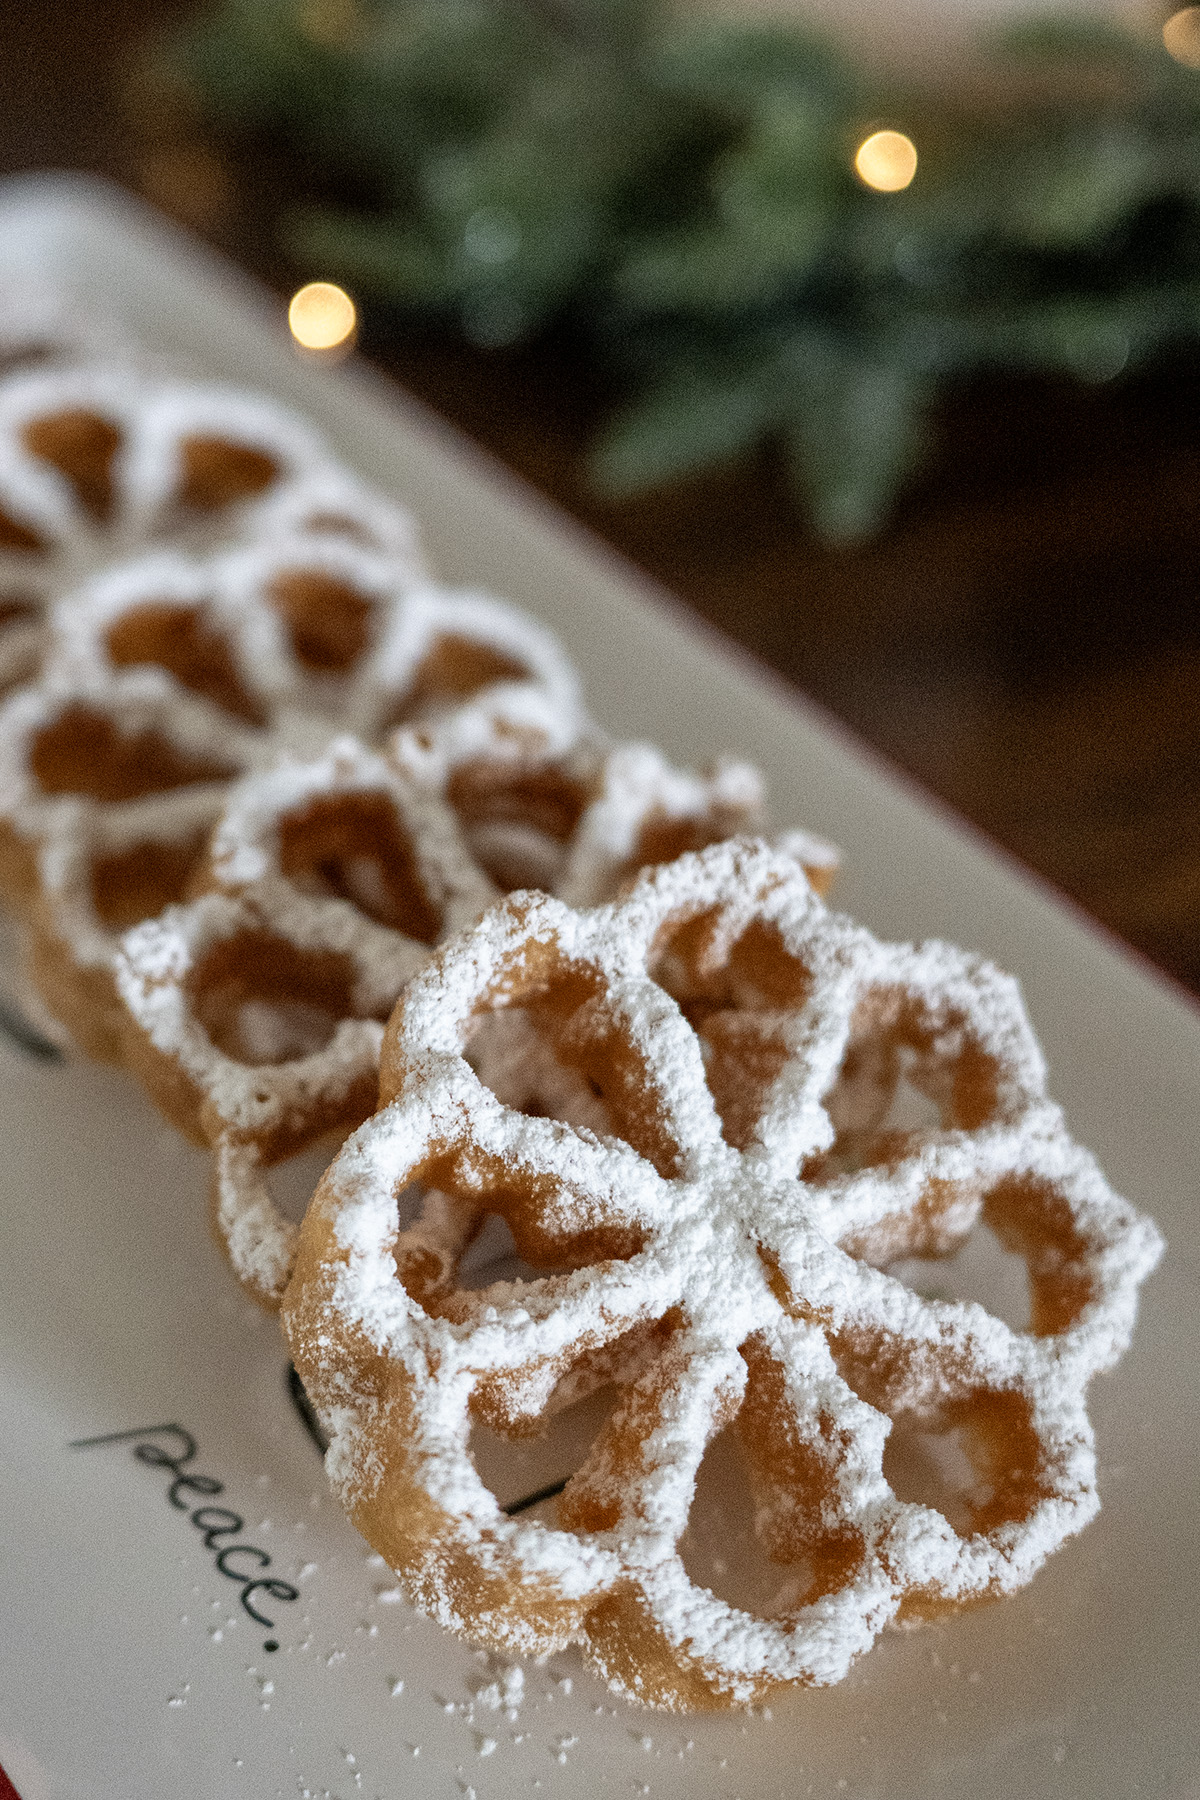
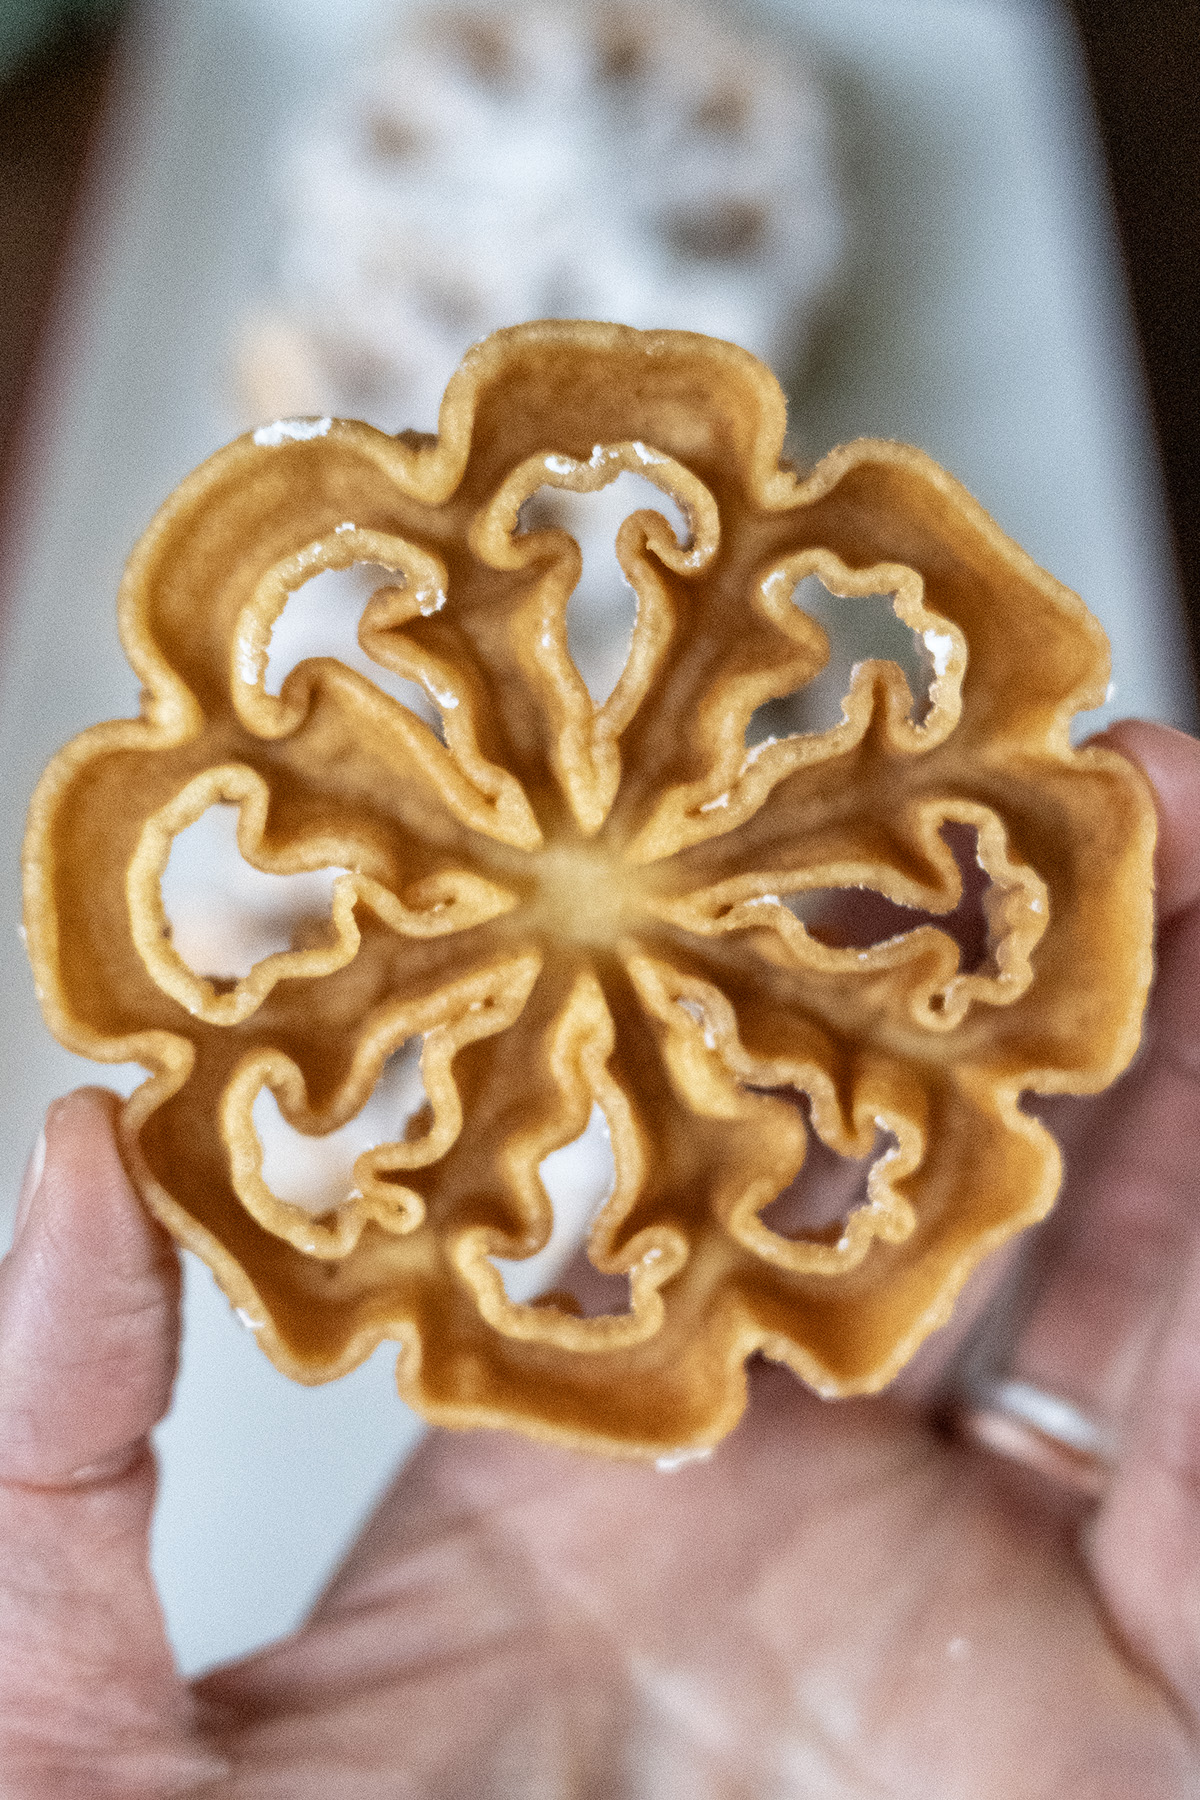
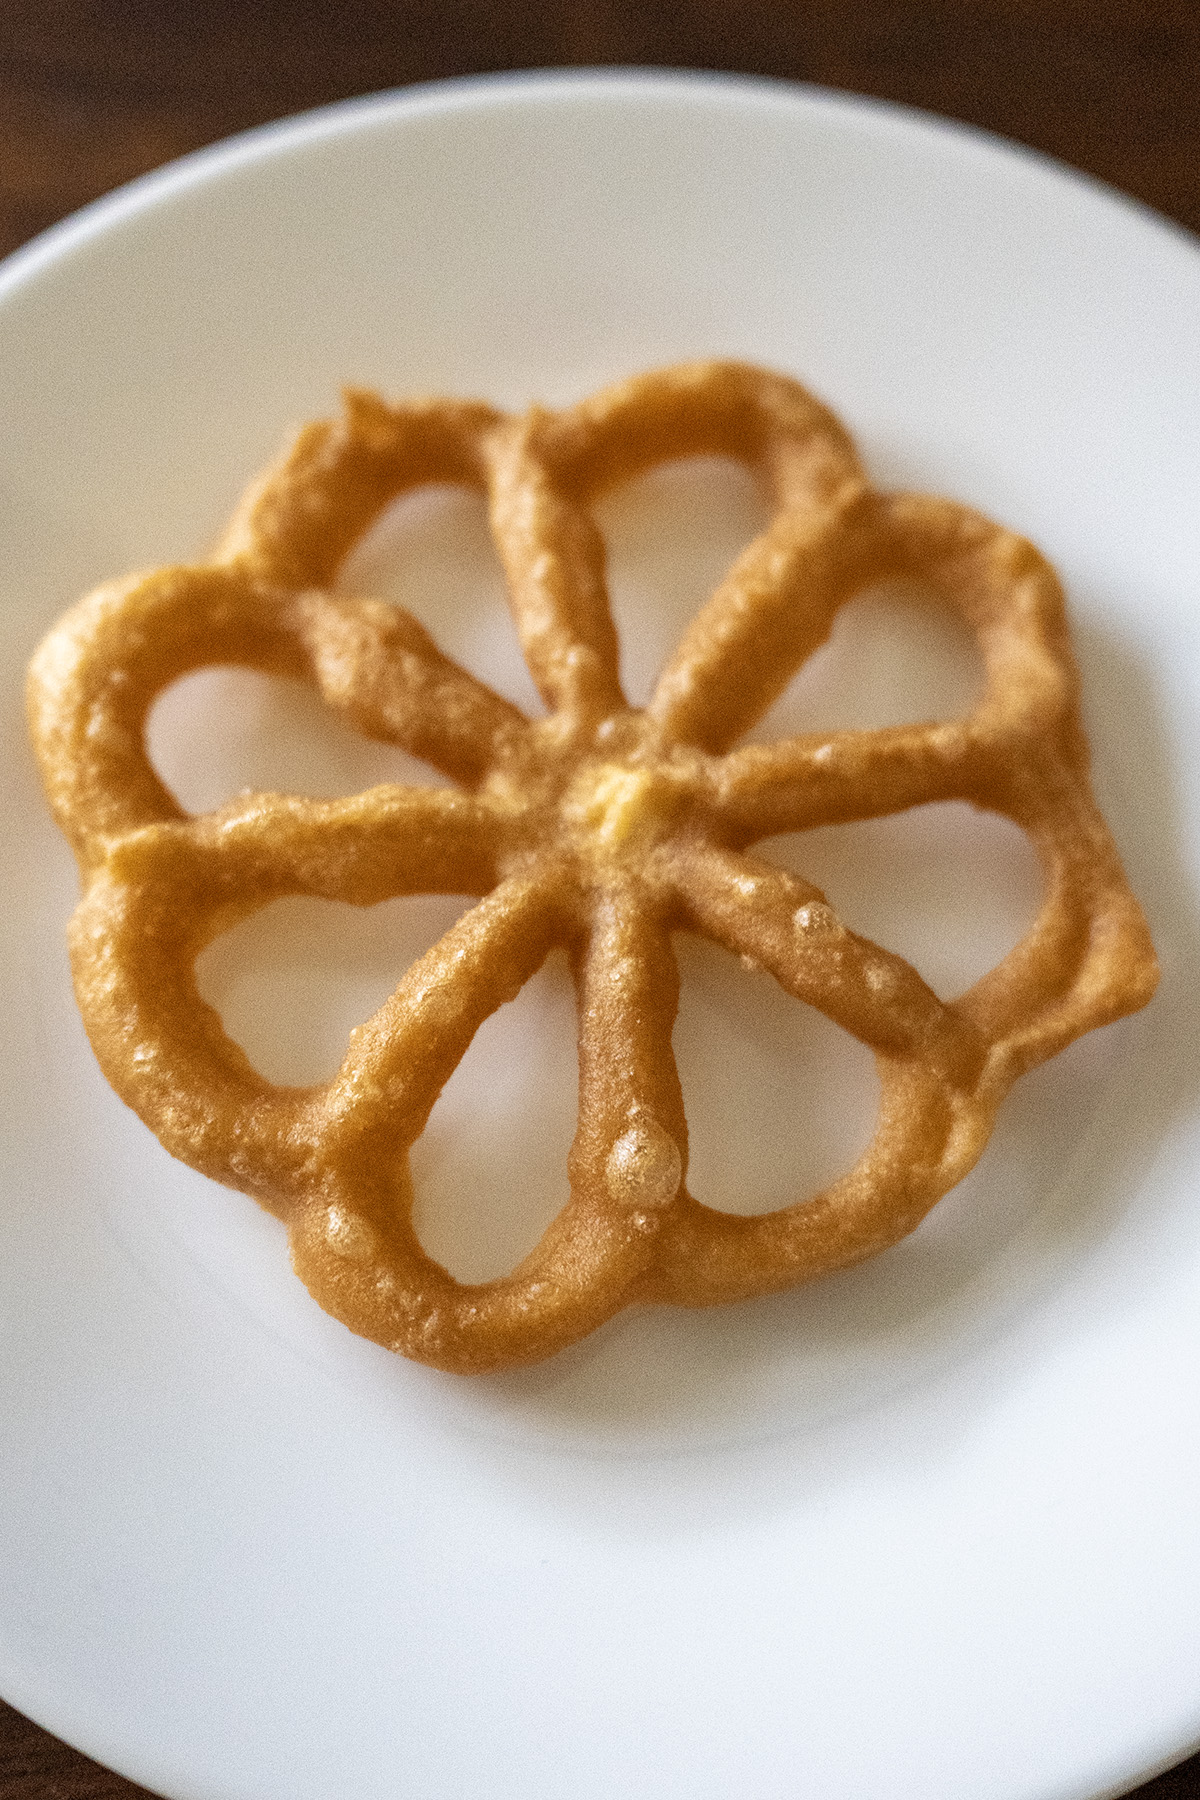
Today I’m sharing the rosette recipe our Swedish-Norwegian family has made every Christmas for generations. These paper-thin, lacy, deep-fried pastries are crisp, lightly sweet, and completely addictive—especially when dipped in cinnamon-sugar (the only correct way in our house!).
A Little Rosette Background
Before we get to making these cookies, I’d like to share a little background. We can (and should) thank Norway and Sweden for gifting us with these little delicious treats. You will see rosettes prominent around Christmastime. However, Indonesia and Mexico also have a variation of the rosette, known as buñuelos.
Rosette cookies are unique in that they are more than just a sweet treat. Their intricate shapes and designs make them as beautiful to look at as they are delicious to eat. You can make rosettes from simple, commonly found ingredients such as flour, sugar, eggs, and milk.
Spoiler: rosettes are deep-fried PASTRIES rather than COOKIES. That said, please forgive me as I refer to them as cookies throughout this post.

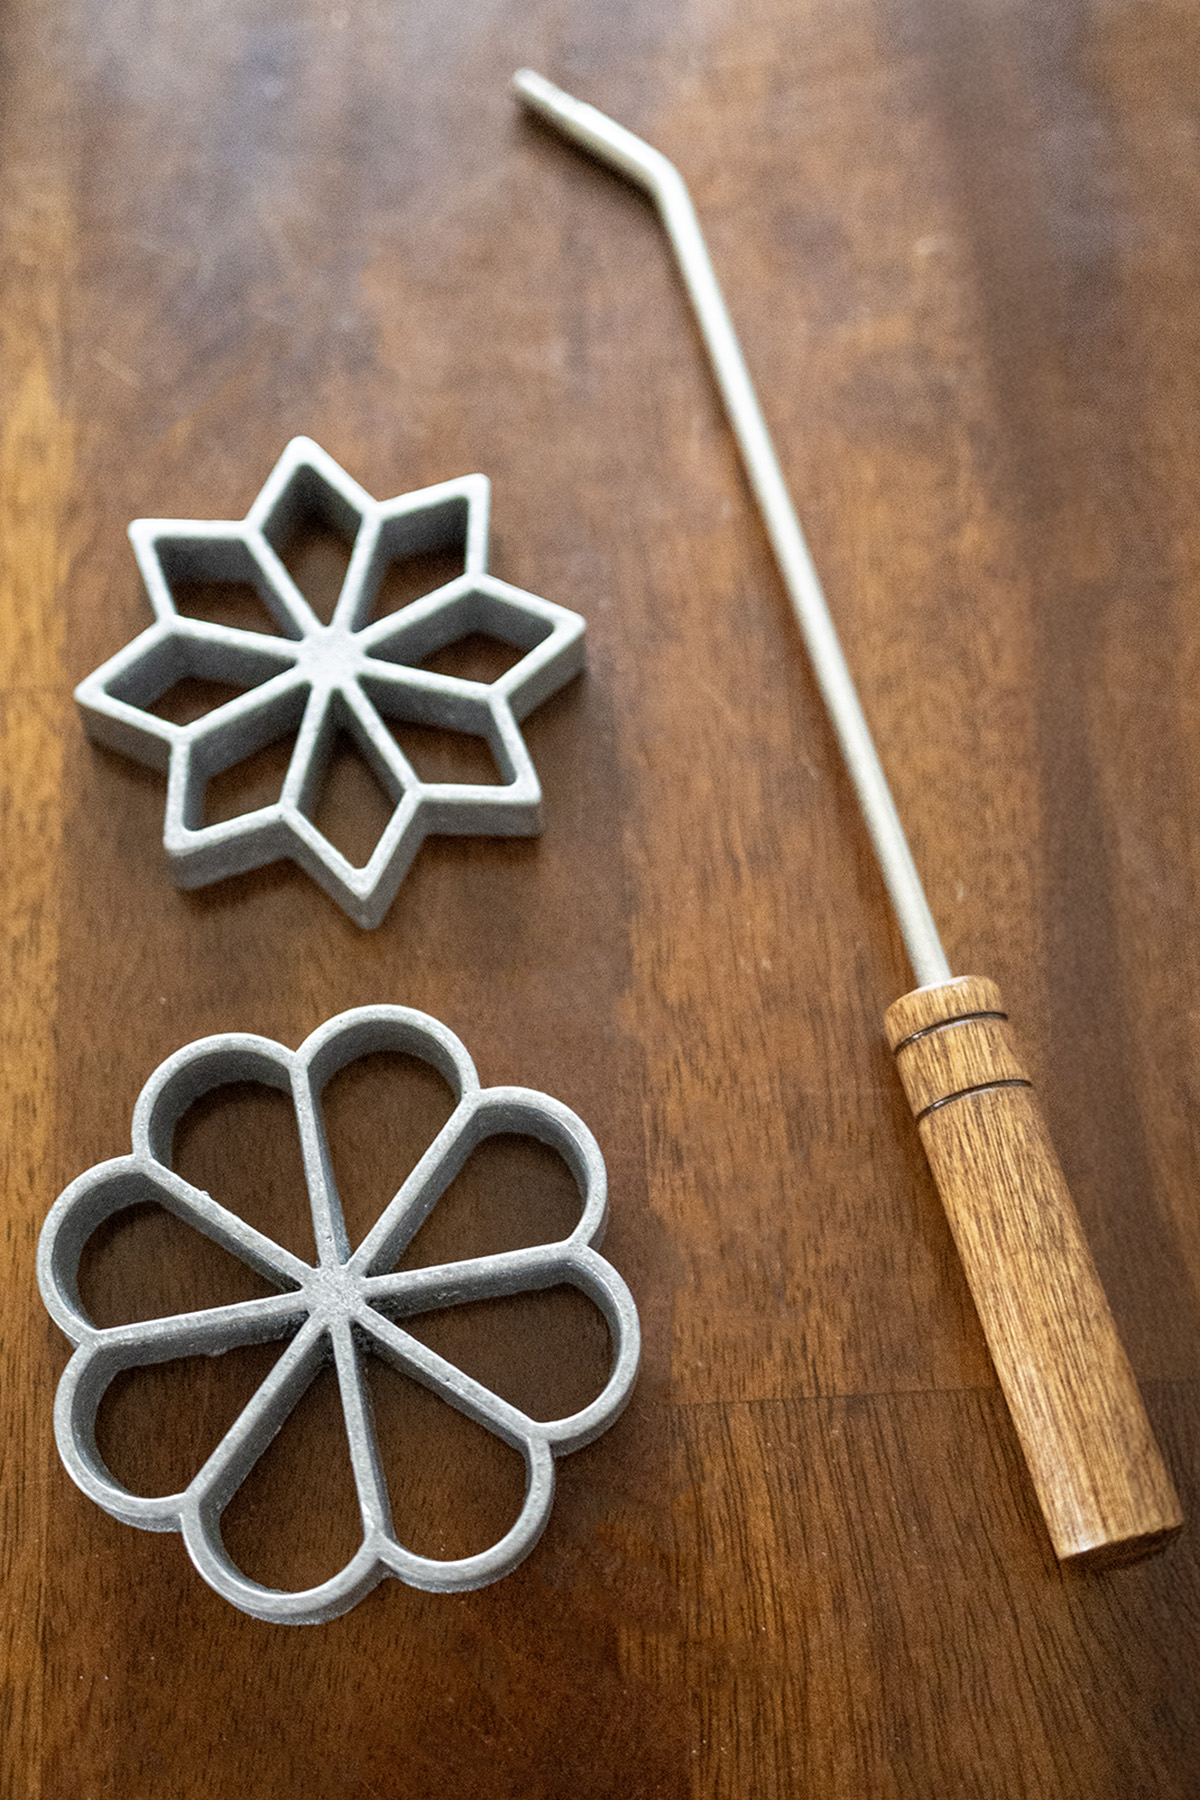
The Rosette Irons – My Strong Opinion After Making Hundreds
You must have a rosette iron. Full stop.After trying almost every brand, here’s my honest ranking:
- Bethany House single iron (my current favorite) – Cast aluminum, perfectly angled handle, long enough that you never burn your knuckles on the edge of the pot. The single mold is easier to maneuver so you never over-batter. Worth every penny.
- Norpro double-prong set (the budget one I used to recommend) – The prongs are at a sharp 90° angle. When you lower the iron into a pot or deep fryer it’s easy to burn your hand on the rim unless you’re very careful or use a deep saucepan. Plus I’ve found that the irons don’t lay perfectly flat so it’s easy to over or under batter. I’ve used it for years but I prefer the Bethany single iron.

- Nordic Ware double-prong set – I’m tempted to try this one since the designs are varied more and so pretty. It’s impossible to adjust the angle on the Norpro one and I’m curious if this one is more adjustable. I’ll update in the future if I try it but would love to hear feedback if you have experience with it.
Important: Bethany House and Norpro molds are NOT interchangeable on the handles.
Our Family Tradition
Growing up, Thanksgiving and Christmas were the two holidays that more of our desserts were influenced by our Swedish heritage. In fact, about 38% of North Dakota’s population is of Scandinavian descent, with the predominant share of that demographic identifying as Norwegian (33%). Suffice it to say, growing up Christmastime included many Nordic treats (such as lefse and krumkake).
Pro Tips – Everything I Wish I Knew Years Ago
1. Be Patient
Making rosette cookies takes time and patience. Don’t rush the process, and remember that practice makes perfect. If a cookie doesn’t turn out right, just move on to the next one.
2. Batter Consistency is Everything
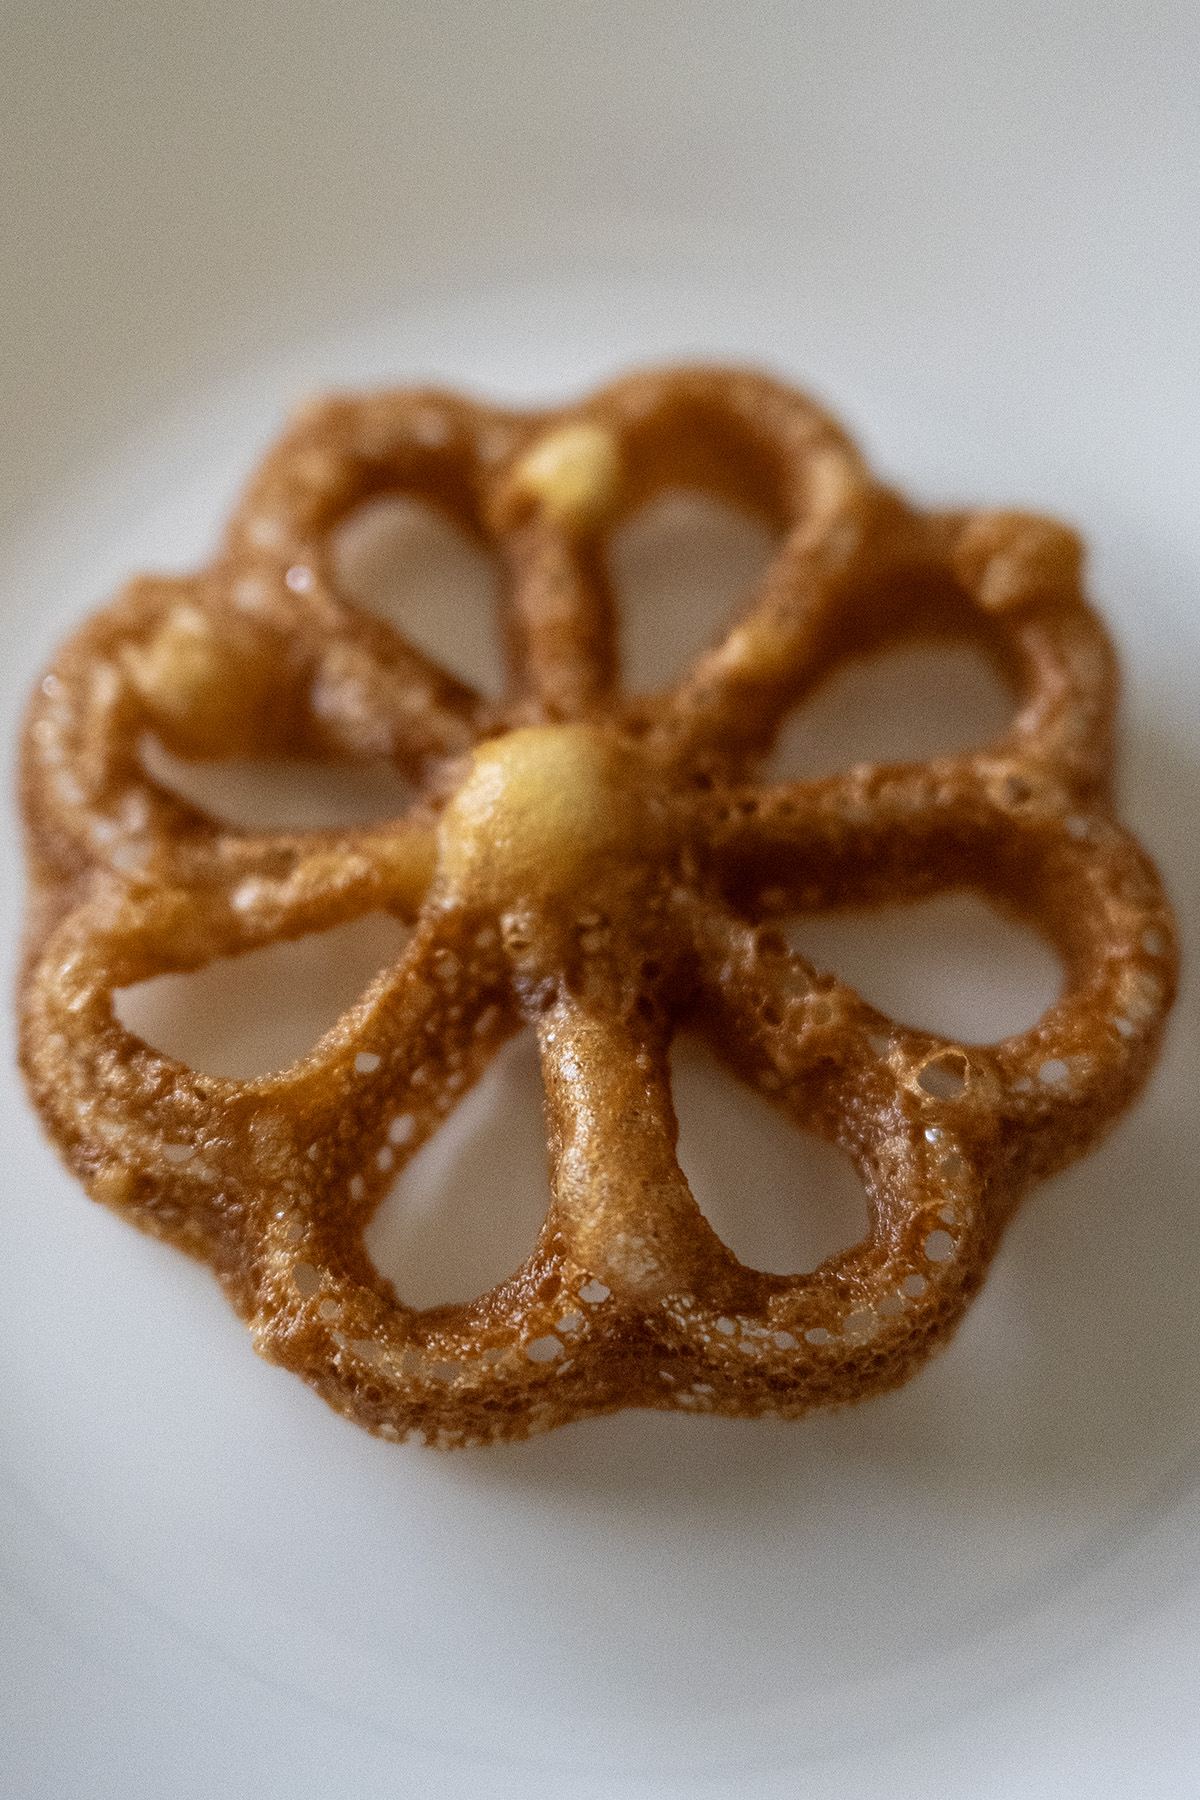
- Too thin: You’ll get super lacey with holes (fragile and easy to burn). Fix by adding flour 1 Tbsp at a time until the rosette is still thin but solid.
- Too thick: Results in heavy hard rosettes. Following my recipe below, you’ll get the right thickness.
Here are two extreme examples of the wrong consistency examples you’ll want to avoid.
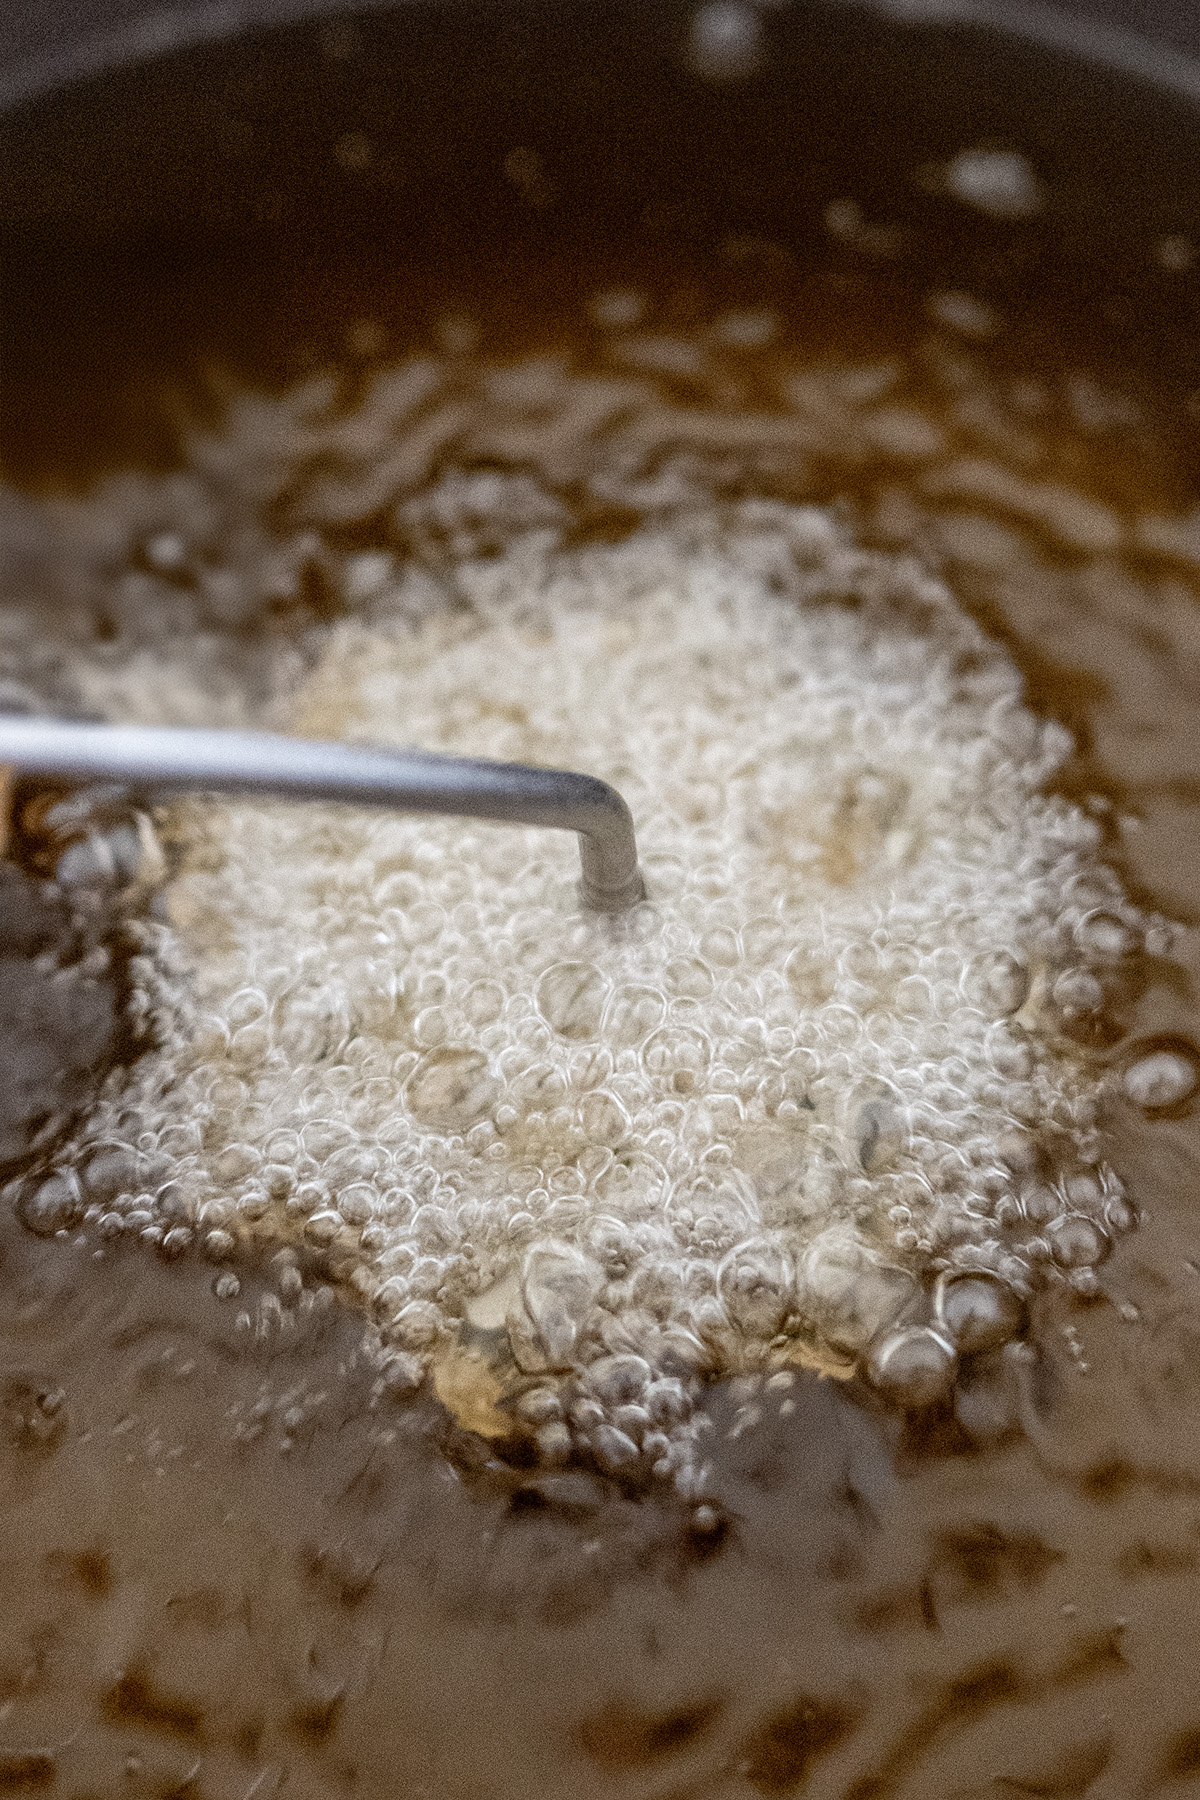
3. Maintain the Right Oil Temperature
The oil temperature is crucial for the success of your rosettes. If the oil is too hot or too cold, the batter may not adhere to the rosette iron properly, or the cookies may not turn out as crisp as they should be. Always use a thermometer to monitor the oil temperature throughout the cooking process.

4. Don’t Pull the Iron Out Too Early
If you lift the iron before the rosette has set, the edges flare open and you lose the crisp defined rim. Wait until the bubbling slows and the rosette doesn’t spread out as you lift the iron.
Oil & Equipment Recommendations
Best oils (in order of my preference):
- Refined coconut oil (my absolute favorite—Azure Standard or Costco)—clean taste, high smoke point, expensive but reusable many times.
- Avocado oil – almost as good and slightly cheaper.
- Peanut oil or grapeseed oil – classic and economical.
Avoid canola or vegetable oil blends if you can—they can taste “off” in delicate pastries.
Deep Fryer Talk
I tried my Presto 8-Quart Big Kettle this year (2025) and was very disappointed. The thermostat runs low and recovery is slow, so rosettes easily come out greasy.
If you have a Presto: fry only 1–2 rosettes at a time and wait 1–2 full minutes between batches so the oil returns to 375°F.
Better options:
- Cuisinart CDF-200: Excellent temperature control
- Heavy 4–6 quart enameled Dutch oven, stockpot, or deep fry pan on the stovetop: My current go-to for perfect heat retention and no recovery issues is a deep fry pan. Use a clip-on thermometer or probe thermometer to make sure your temp doesn’t drop below 365°F (185°C).
The Only Two Ways to Eat a Rosette
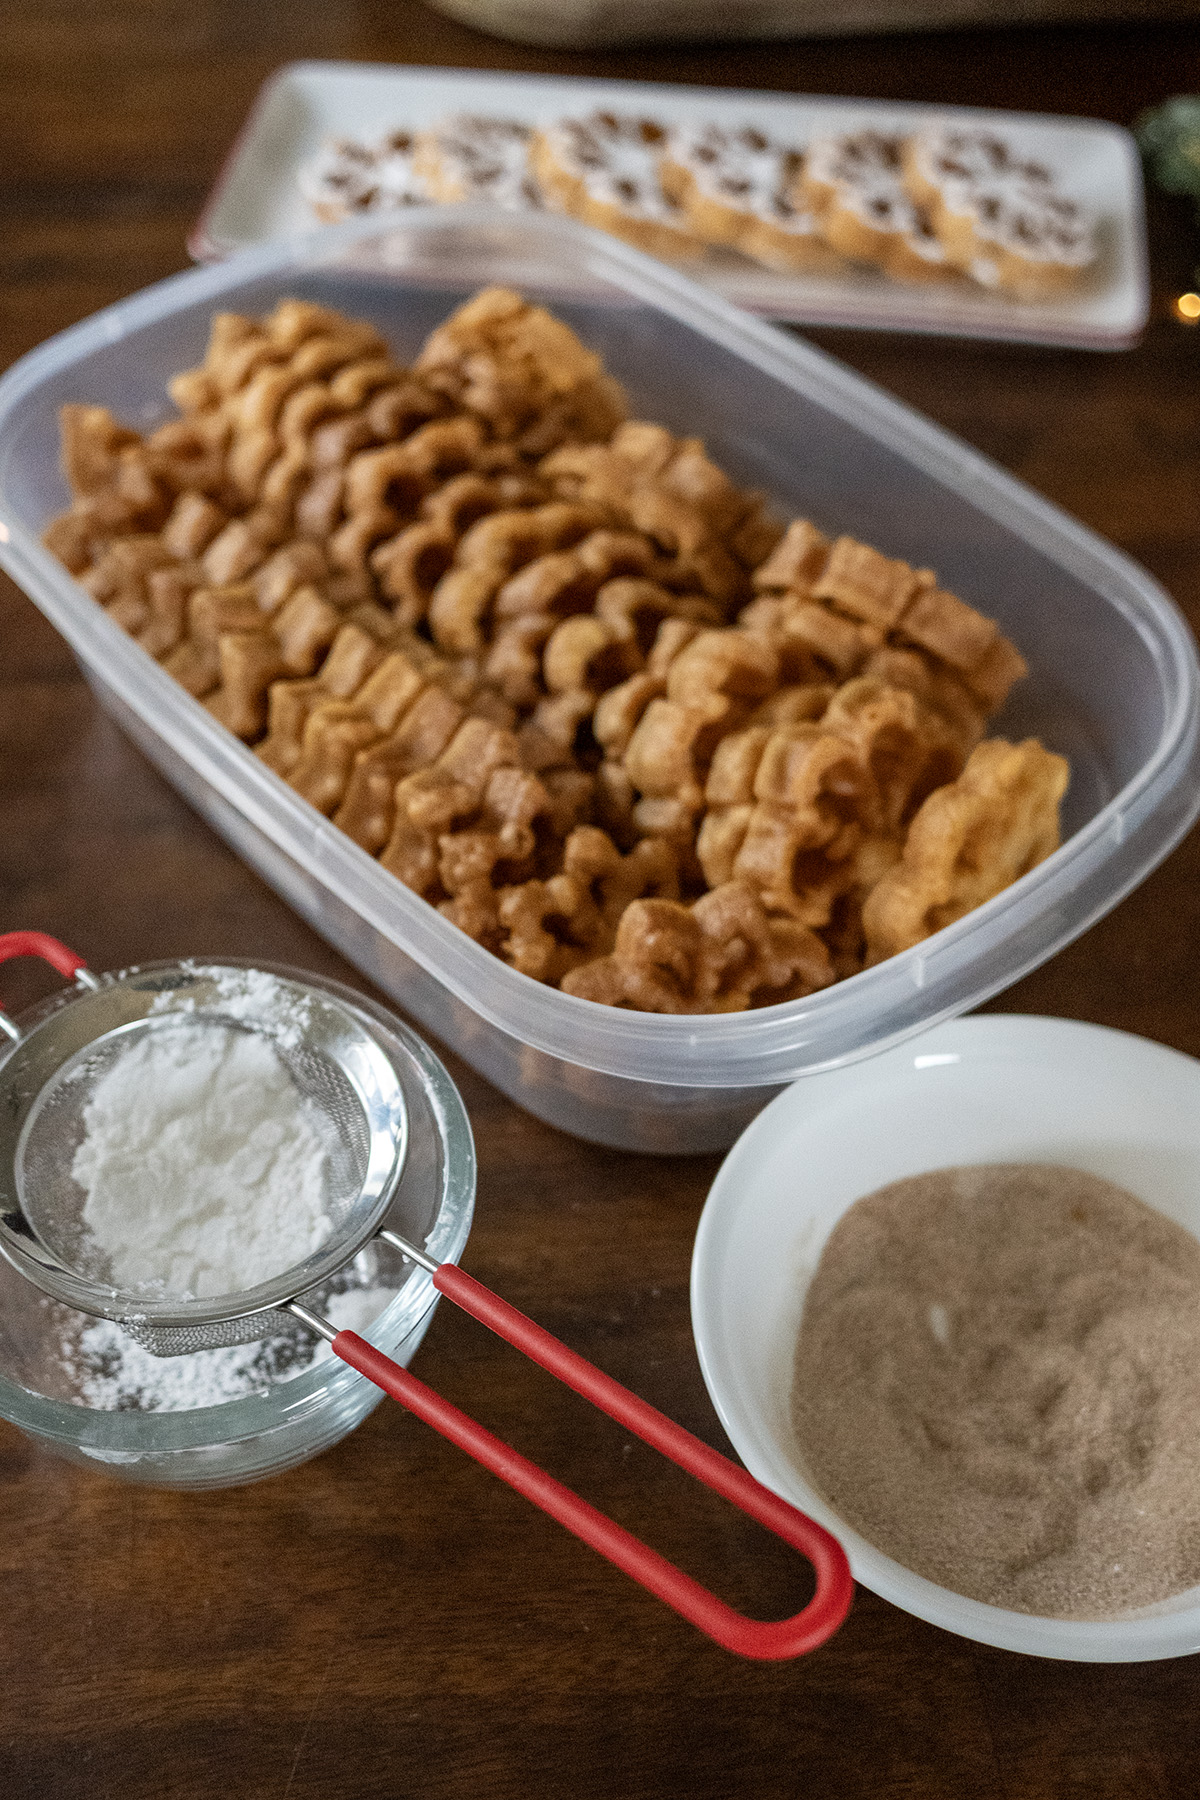
- Cinnamon-sugar (family law in our house) – ¼ cup sugar + 1 tsp cinnamon. Dip open-side up.
- Powdered sugar (very pretty but less flavor).
Storage & Freezing (the right way)
Cool completely, then freeze uncoated in a large airtight plastic container (no parchment needed—they don’t stick). They keep 2–3 months.
To serve: take out only what you’ll eat in the next few days, dip straight from frozen into cinnamon-sugar (no thawing needed), and leave at room temp. They stay perfectly crisp for days as long as you’re not in a high-humidity region.
Common Problems & Fixes
- Rosette stuck to iron: You dipped too far and the batter sealed over the top. Start over with a clean iron.
- Chewy instead of crisp: under-fried rosette, your oil was too cool, or your home is humid. Fry to deep golden, check your temperature religiously with your thermometer, and store rosettes properly (see section on storing and freezing).
- Greasy: This is not very noticeable until the rosette is completely cooled. If this happens, your oil temperature dropped below 365°F. Use a thermometer religiously.Oil or Candy Thermometer
- Batter won’t stick and slips from iron: Your iron was not hot enough or the batter became too warm. Keep half the batter chilled while you fry.
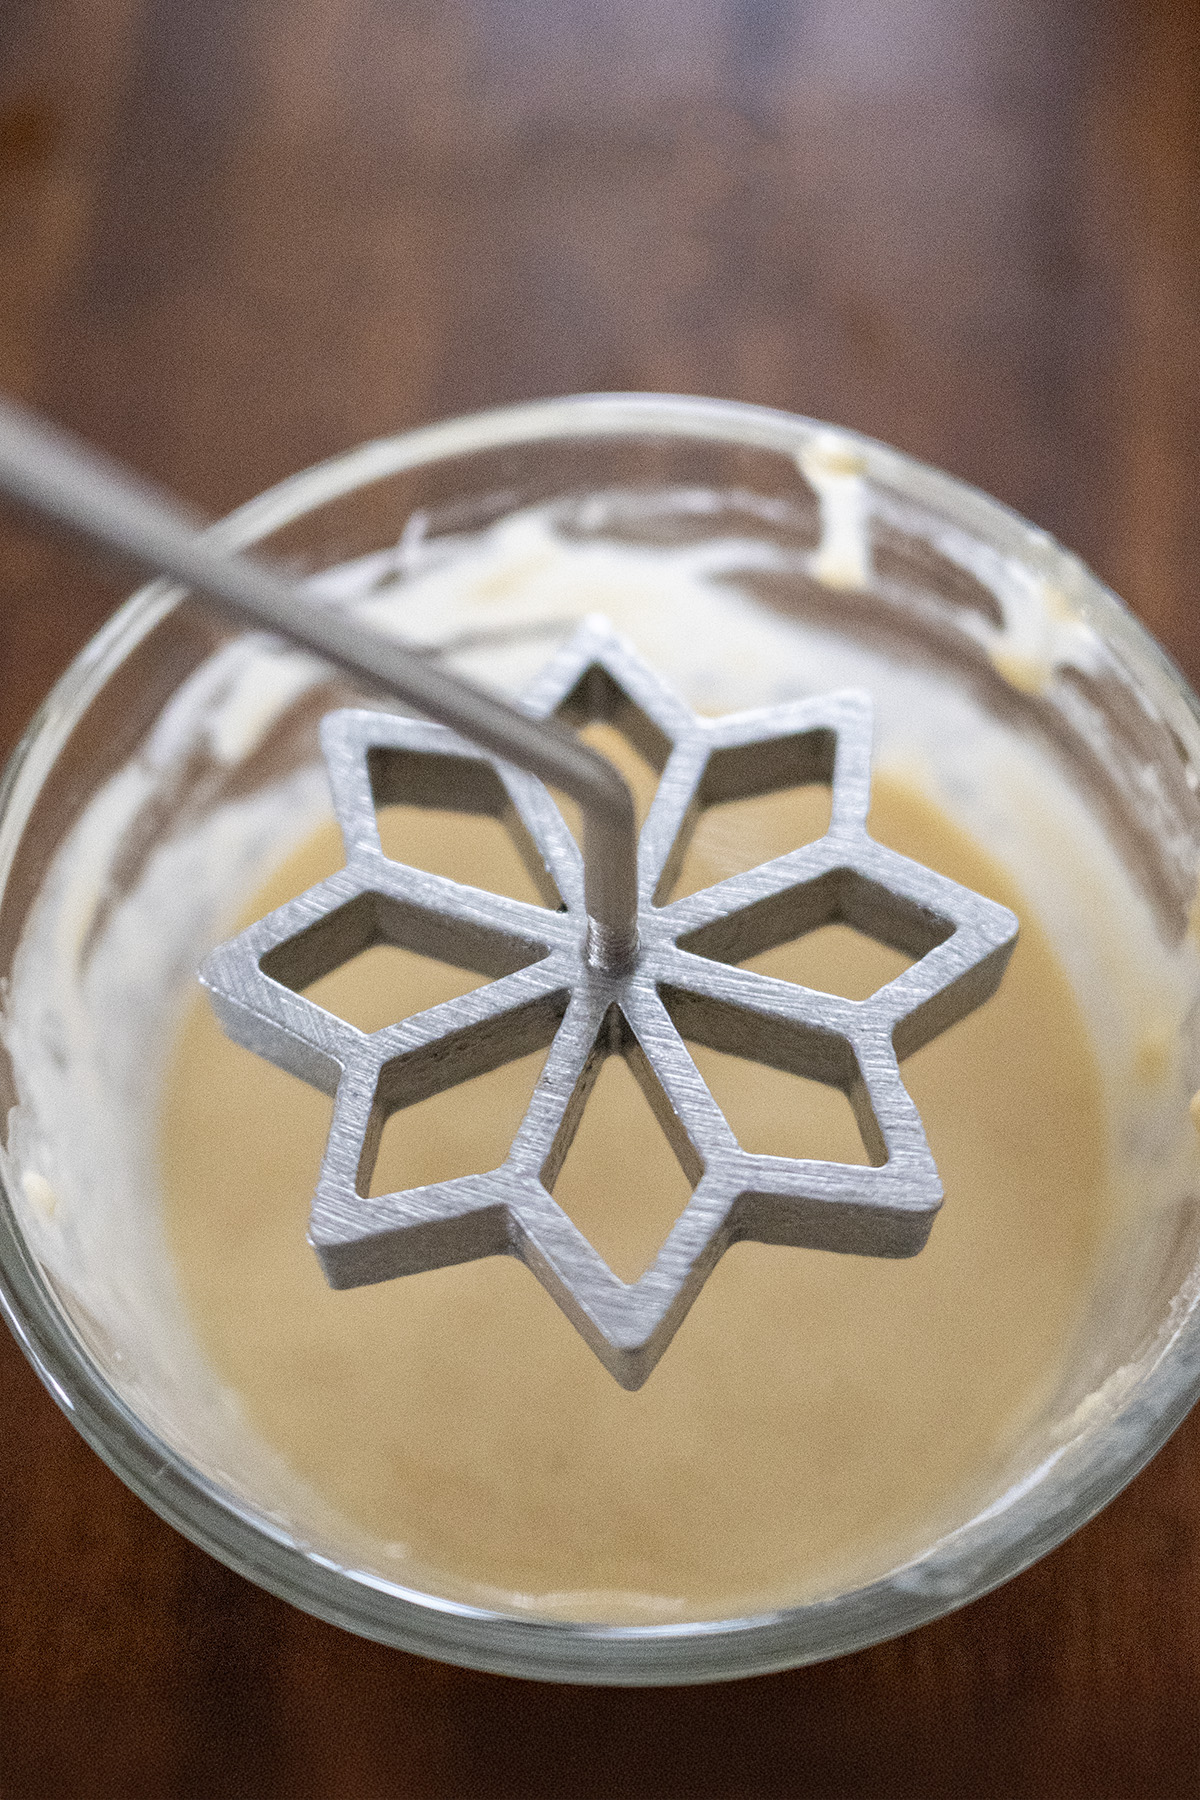
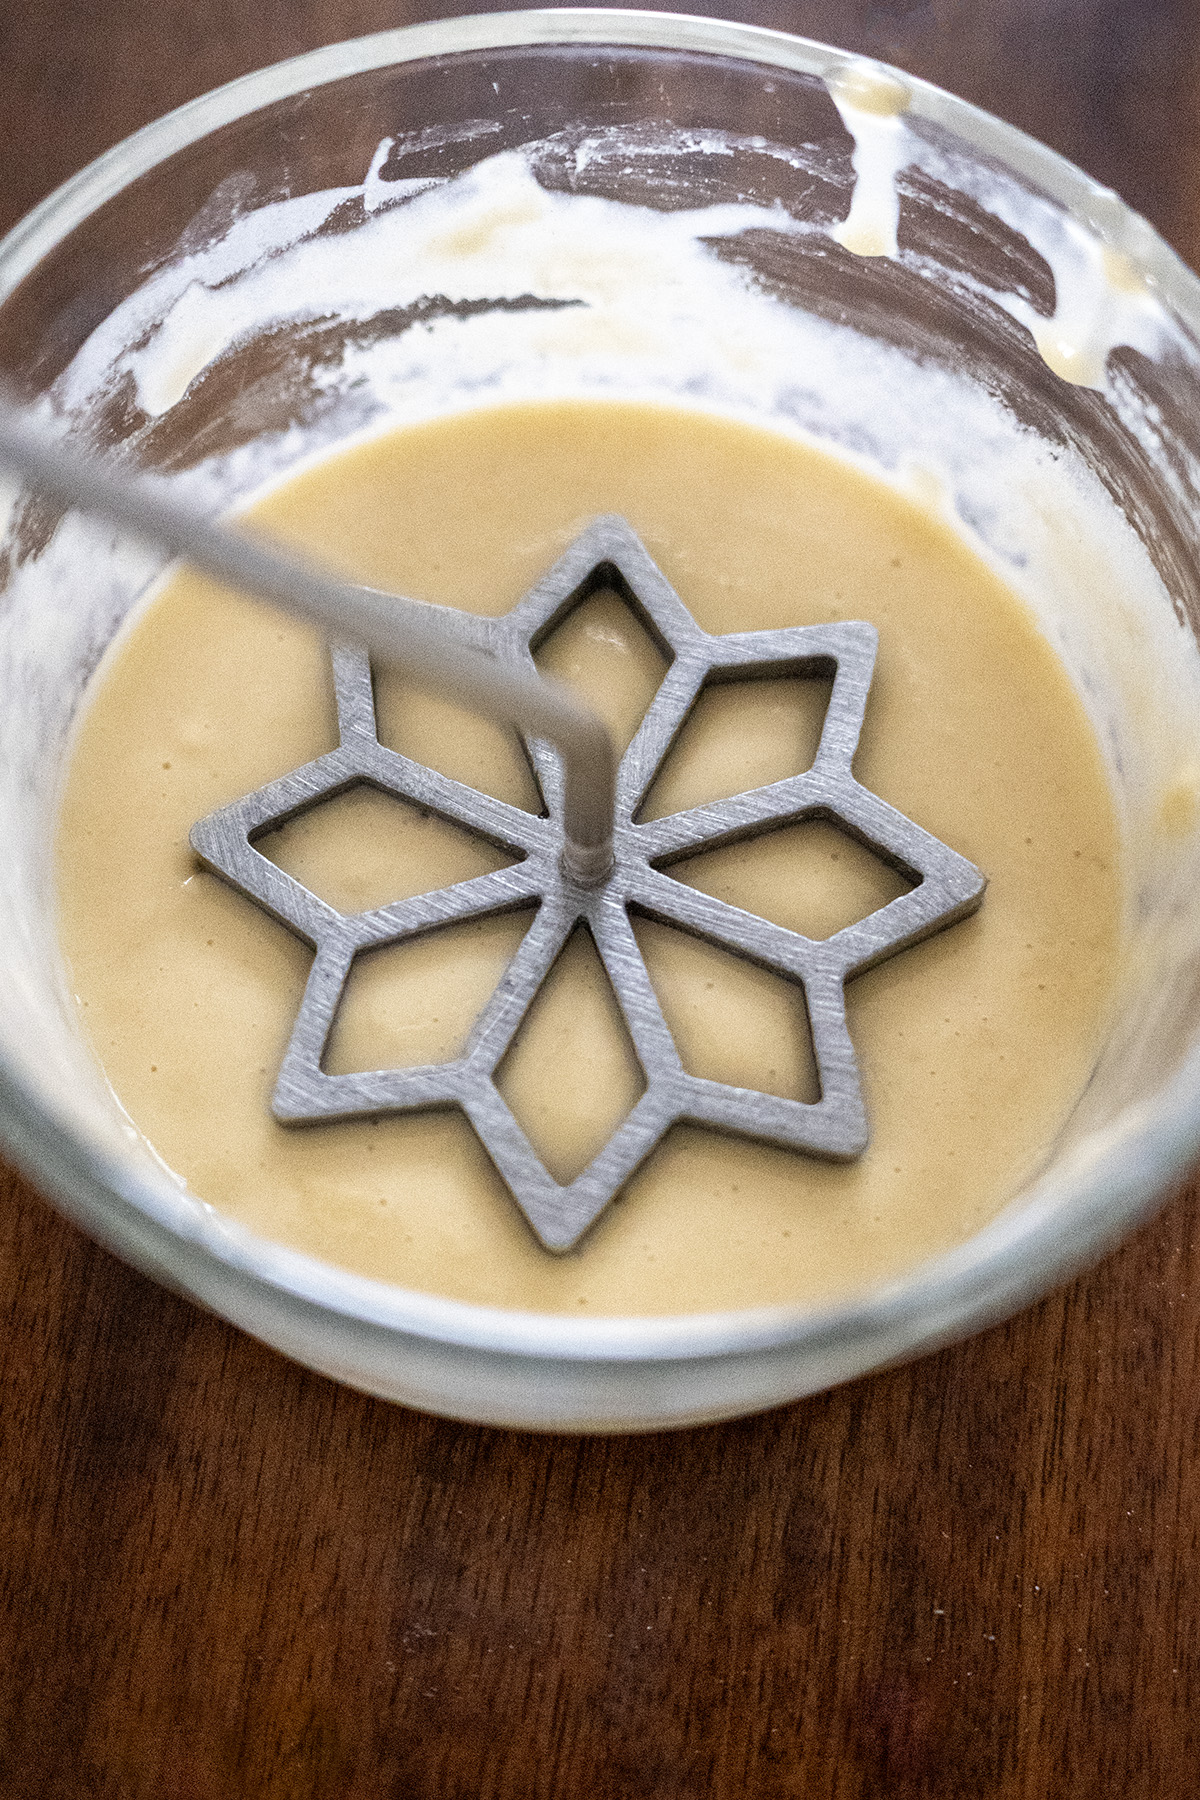
Carefully dip the hot iron into the cold batter, ensuring that the batter covers the mold but does not go over the top. If the batter covers the top of the mold, the fried cookie will be impossible to remove intact. If you dip your cookie iron into the batter too far, you will need to wash the iron before trying again.
Final Thoughts
Making rosette cookies with a rosette cookie iron is a wonderful way to celebrate the holiday season or to simply enjoy a fancy treat. While it may take some practice to make, the end result is well worth the effort. Grab your rosette cookie iron and start making your own batch today!
Happy frying!
The BEST Scandinavian Rosette Cookies
Print Recipe
EQUIPMENT (affiliate links)
- kitchen scale for best accuracy
- bethany rosette iron current favorite, or
- stockpot or
- paper towels
Ingredients
- 2 large eggs
- 1 tbsp (12) granulated sugar
- ¼ tsp salt
- 1 c. (244 g) milk
- 1 tsp vanilla extract
- 1 c. (125 g) unbleached all-purpose flour (RECOMMEND WEIGHING) plus more if needed
- oil for frying refined coconut oil or flavorless oil
Cinnamon Sugar Topping (or Powdered Sugar)
- ¼ c. granulated sugar
- 1 tsp cinnamon
Instructions
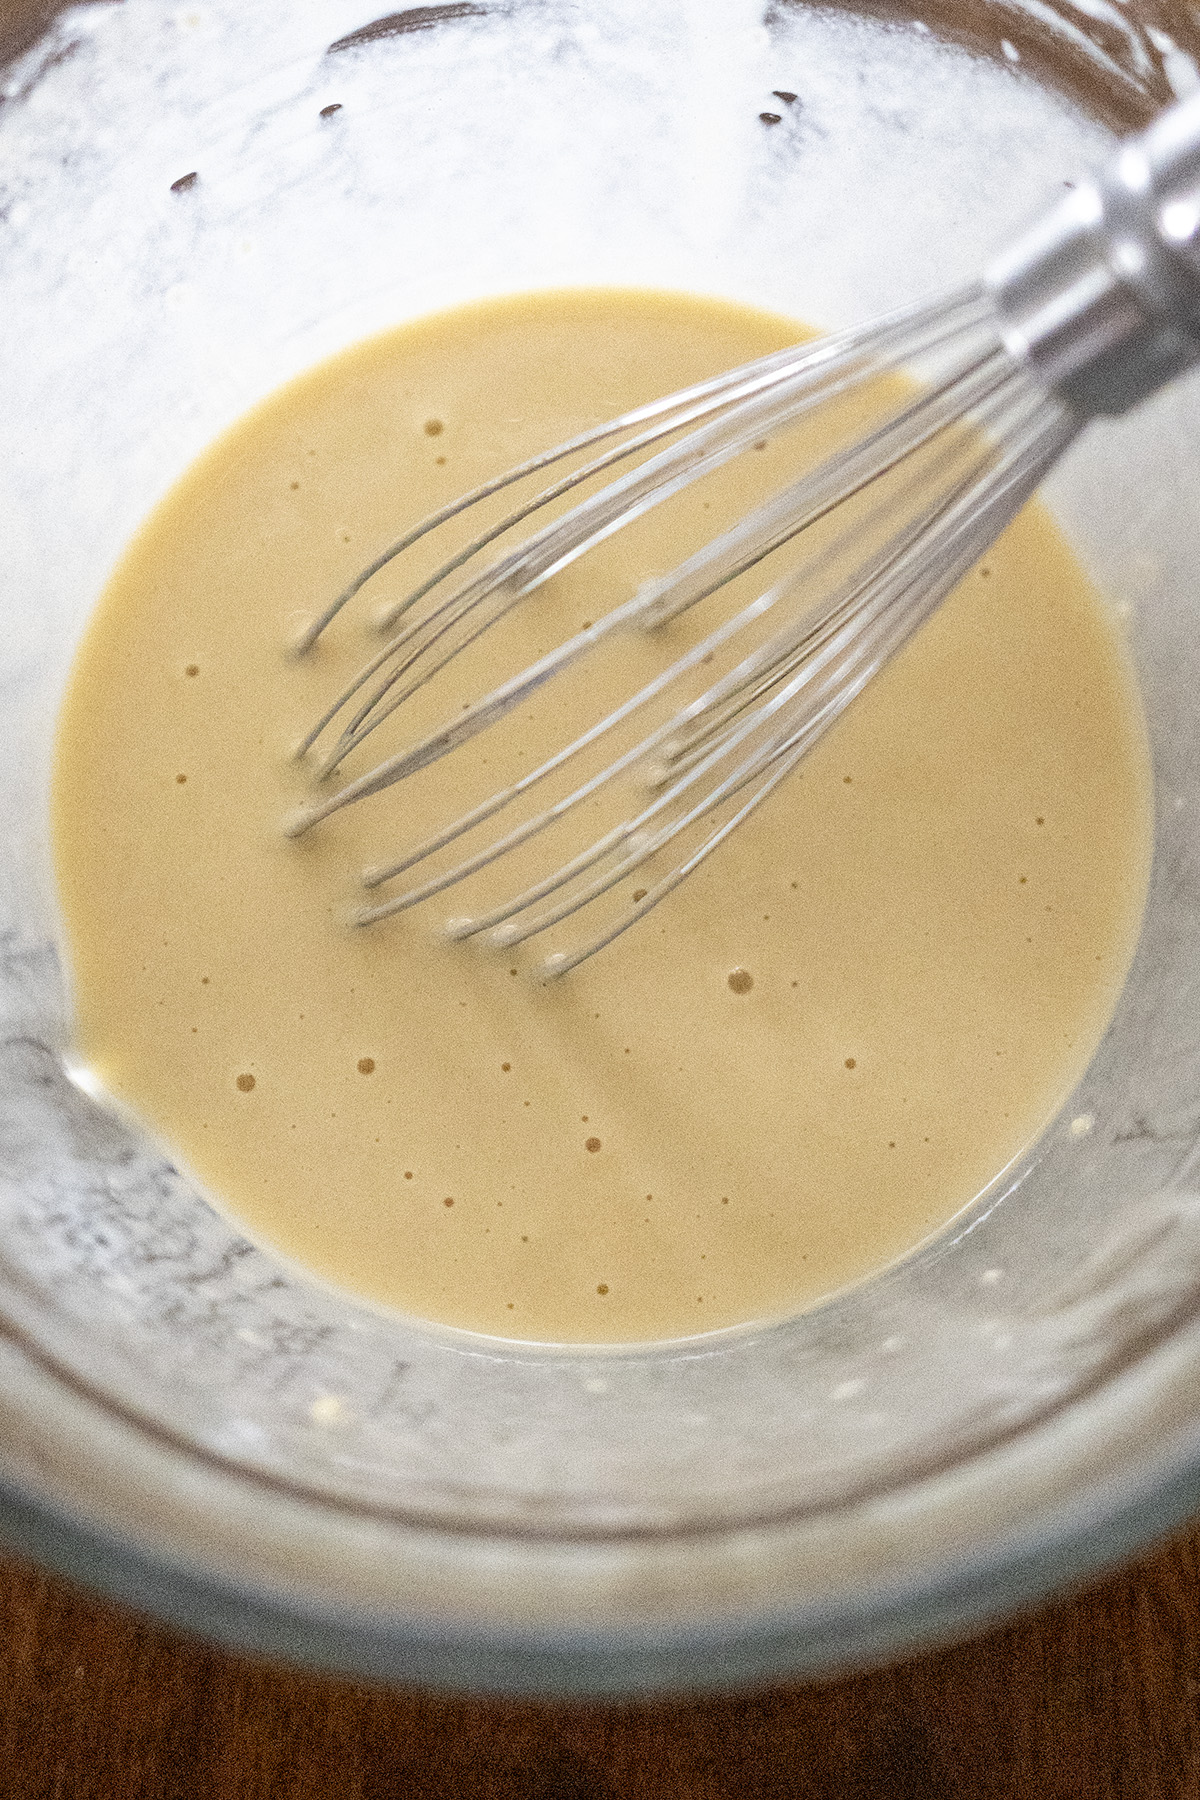
- In a medium bowl, whisk eggs, sugar, and salt well.2 large eggs1 tbsp (12) granulated sugar¼ tsp salt
- Add milk and vanilla; whisk well.1 c. (244 g) milk1 tsp vanilla extract
- Whisk in flour until completely smooth. Batter should coat the back of a spoon like thin heavy cream. If rosettes are too thin after frying, add additional flour 1 tablespoon at a time.1 c. (125 g) unbleached all-purpose flour (RECOMMEND WEIGHING)
- Refrigerate batter while you work (keep half chilled while frying the first half — cold batter sticks and releases better).
- Heat oil to a steady 370–375 °F (188–190 °C).Use a clip-on thermometer!
- Heat rosette iron in the oil 12–15 seconds, lift and let excess oil drip off completely. Dab iron on a plate lined with a paper towel to remove excess oil.
- Dip hot iron into cold batter only until the batter comes ⅛ inch (3 mm) from the top edge. Immediately submerge in hot oil.
- Fry 25–45 seconds until rosette holds it's shape. Gently shake or fork the rosette off the iron and continue frying until golden
- Drain open-side down on a wire rack over paper towels. Cool completely.
- When ready to serve (even straight from the freezer), dip or shake in cinnamon-sugar.
Notes
- Best oils for smoke point (in order):
- refined coconut oil (my favorite)
- avocado oil
- peanut oil
- grapeseed oil
- Recommended irons (in order):
- Bethany House single irons (better control and angled handle prevents burns).
- Norpro double-prong irons have a 90° angle that can burn your hand on the pot rim — use caution.
- Nordic Ware double-prong irons – similar to Norpro but pretty designs
- Fryer Choices:
- Presto deep fryers often run cool — fry only 1–2 rosettes at a time and wait 1–2 minutes between batches so oil returns to 375 °F.
- Cuisinart CDF-200 fryer
- Heavy 5–6 qt enameled Dutch oven (stovetop)
- 6 qt stockpot (stovetop)
- Deep Fry Pan (stovetop)
- Freezing: Store uncoated rosettes in an airtight container in the freezer up to 3 months. Coat in cinnamon-sugar straight from frozen — no thawing needed.
- Common Problems:
- Too lacey/holey = batter too thin → add flour 1 Tbsp at a time.
- Flared/open edges = pulled iron out too early → wait until bubbling slows and color is deep golden.
- Undercooked rosettes turn chewy — fry to deep golden every time.
- Oily Rosettes = temp of oil is too low → use a thermometer to adjust and maintain a temp between 370-375°F.
- Too lacey/holey = batter too thin → add flour 1 Tbsp at a time.
- For more details on frying oil, see here.
As an Amazon Associate, I earn from qualifying purchases at no extra cost to you. Thank you for your support!
Made these this evening…they are lovely. I added more vanilla than recipe called for being that I love vanilla.
So glad you enjoyed them, Linda! You can’t go wrong with more vanila!